
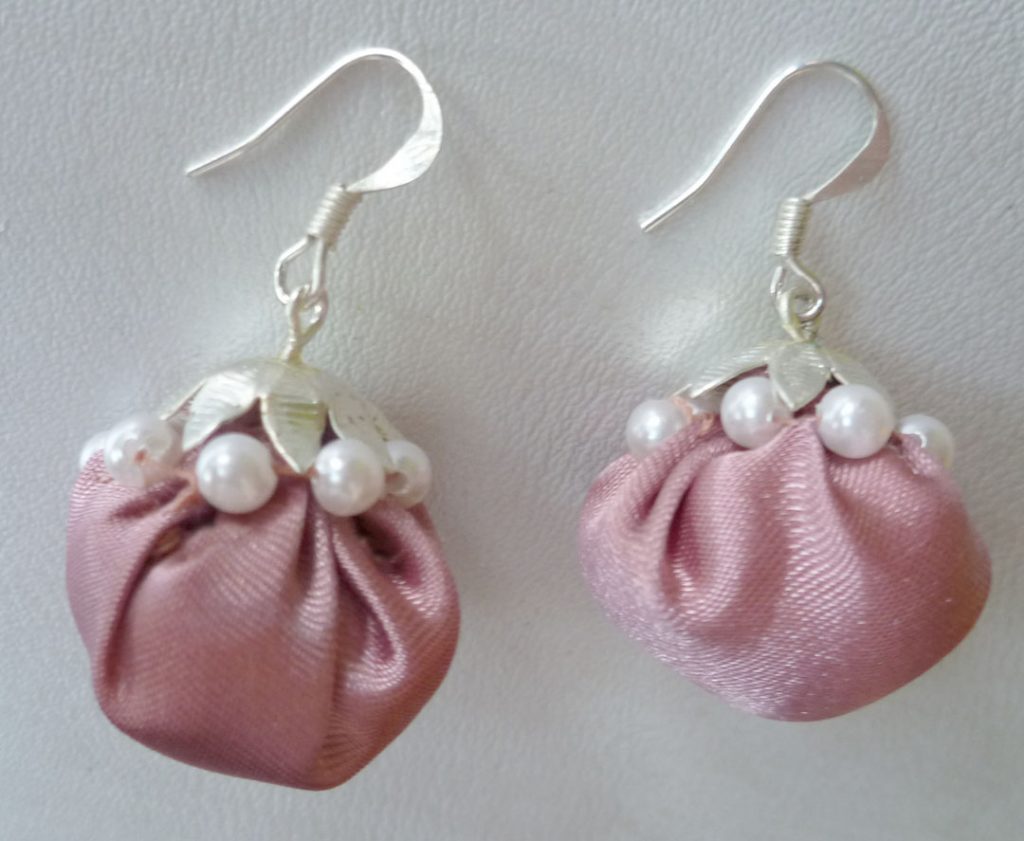
Jhumka or Jimki earrings are earrings that usually drop from a stud or a hook in the shape of a basket, cage, a barrel or a ball. These earrings are traditionally made in gold/ silver but can be adapted to many different materials. Today I would like to show you how to whip up a pair of Fabric Jhumka earrings in about 40 minutes (which includes 30 mins drying time).It is very light to wear, looks pretty and costs nothing – I bet you have a scrap of fabric, some ear wires and couple of eye pins lying around – no kidding, that’s all it takes. 🙂

Fabric Jhumka earrings tutorial
Materials Required :
1) Fabric scrap – 2 squares of 2X2 or 3×3 (any size depending on what you want)
2) 2 eye pins
3) 2 bead caps
4) a pair of ear hooks
5) Cotton or polyfill for stuffing
6) Pearls or normal beads for decoration
7)matching thread and sewing needle
8)Fabric Adhesive or clear glue
9)Scissors and one set of pliers
Procedure:
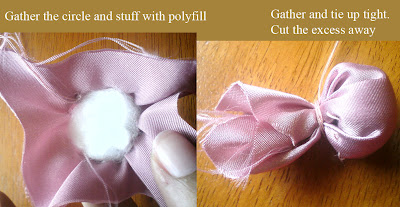
1) On each of the cut square, draw a circle (on the reverse) and do running (gather) stitches on it. I am using a blush pink satin fabric for demonstration – you can use any fabric from glass tissue (above pic) to silk to cotton

2) Gather the stitches and stuff the pouch with cotton or polyfill. Tighten till you get the shape of a candy pouch. Slowly flatten till you get the desired shape. Try around the mouth and knot. Cut the excess fabric and secure with a drop of glue.
3) Take your bead caps (I used a plated flower design for this project) and slightly flatten it with a hammer so that it opens out a little. You can skip this step if you bead cap is wide enough to cover the fabric excess by itself. Now add the ear wires to the sized eye pin (cut the eye pin to desired length so that it just gets into the pouch) with the pliers. Then drop this whole set in to the bead cap and reverse it onto the tied up pouch or potli as we call it. Glue it in place. This make take a while (around 30 minutes to dry). You can even add the ear wires after the jhumka dries.

4) To hide any stitches that are visible and to decorate the piece, just stitch on some pretty beads or little pearls as embellishment. You Jumkha earrings are now ready. Wear them with pride and a smile on your face.


If you notice the first picture, you can completely change the look and feel of the Fabric Jhumka Earrings by changing your supplies – the fabric, the bead cap and the beads you get a completely different look and feel for the earrings. Try it sometimes.
I hope that you will find it interesting.
Cheers

Leave a Reply