When my friend from college got married a few months back, I really didnt know what to give her. Since she was going to USA, I didnt want to give her anything that she wouldnt want to carry from here.That’s when I thought of jewelry. But I also knew that she was/is not a jewelry person. As my dilemma mounted up, I even thought of going bare handed to the reception, but felt bad, as it is against my tradition to see a newly married bride/couple without any gifts. Finally I thought what the heck and made her a simple tie up corsage, which she could wear during her honeymoon or even for a formal occasion. Thats what this tutorial is for. It can also be a great bridal accessory in Christian/western weddings.If you having a DIY wedding, you could even make something like this for the bridesmaids.
PS: my friend really liked the corsage…so off to the tute.
– tulle/gauze,tissue ( I picked a white & silver jacquard tulle)
-Satin tape (in a colour matching to the tulle). I chose beige
– pearls, beads and focal objects
– a piece of felt or fabric felt
– scissors, sewing needle and thread
– clear glue
Procedure:
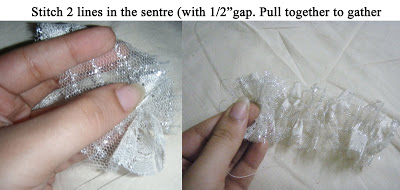
1) Measure your wrist circumference and cut a length of tulle that is twice that measure. Choose the width depending on how broad or narrow you want the corsage to be. Then pick the approximate center and start making gathering stitches from one end to the other. Leave 1/2″ gap and repeat. Full to gather and tie the knots.

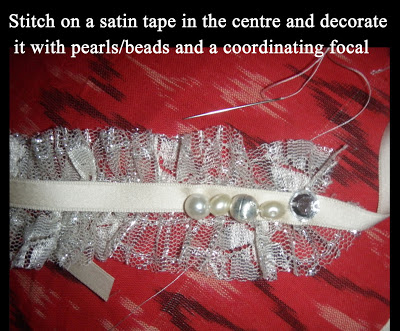
2) Press the tulle down (you can weigh it down with a book if your tulle/gauze is stiff). Then place (the center of ) the length of satin tape (wrist circumference plus min 3″-4″ on each side for tie up). You can make it as long as you want. Singe or fray check the edges of the tape before starting to stitch.You can either stitch them together using a machine or hand stitch as I did. Since I was hand stitching, I attached the silver beads and pearls as I went to save time.
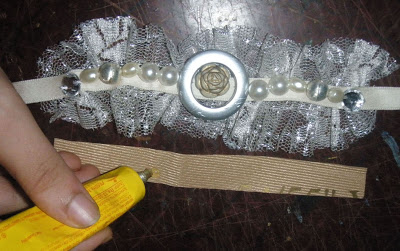
3)Before you start this project, think about your focal piece. It can be a bead, a ring, the top part of a brooch/clip/clip on earrings, a personalized photo charm, anything that you think will do justice to this corsage. Since I wanted mine to be simple (my friend is not a bling person), I chose a focal rose bead and a matching silver colour ring for the center. I first glued it down and rand a couple of stitches through it to secure it.Then complete the other side with pearls and beads. Finish and secure.
4)Once finished, glue a strip of felt/fabric felt on the understand to cover the stitches and to provide stability to your corsage. Don’t we all like our pieces to be neatly finished?
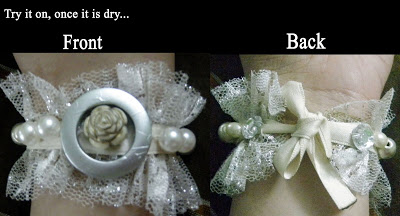
5) Its done, wear and enjoy or gift wrap it to be given away as a present
I hope you find this project interesting.
cheers


Leave a Reply