
 Hey here’s a post on accessories after a really long time…(I’ll accept it that jewelry is much more fun to make). But now faced with an emergency (I need a scarflet desperately) I decided to make one. A re-purposed one.
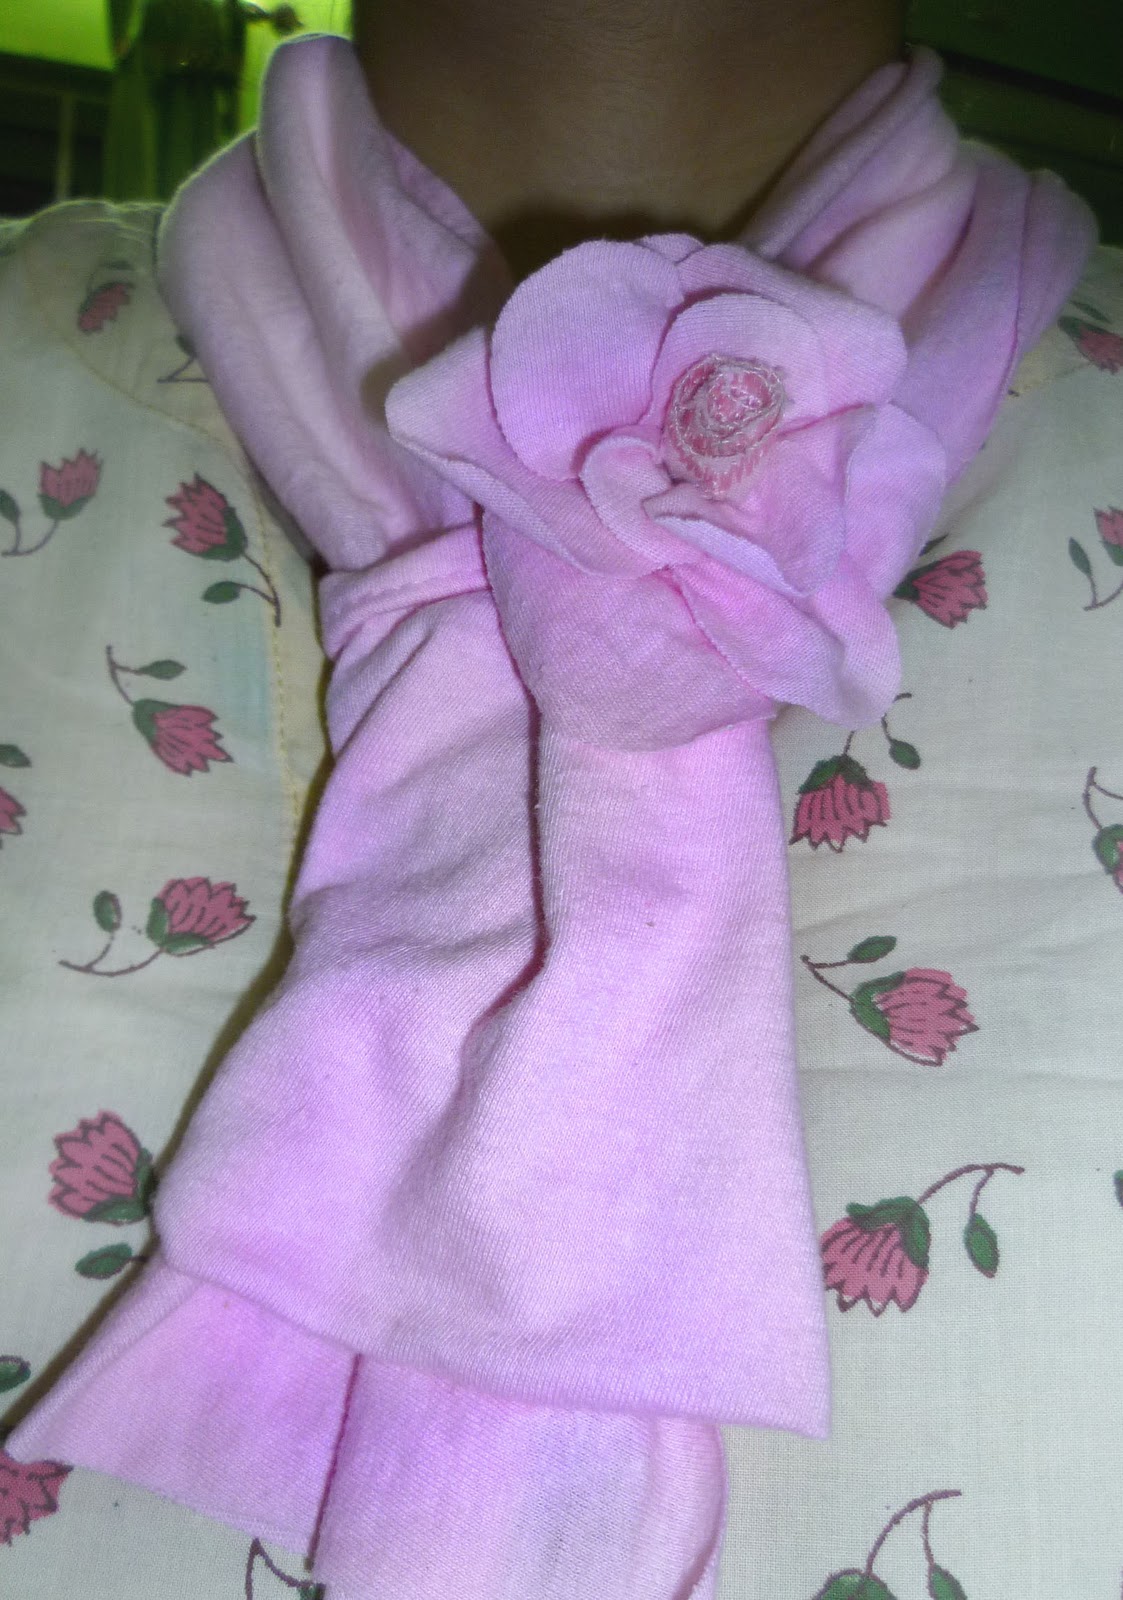
When a newly bought cami tears, I find it very irritating..The only thing the comes out of it is a dust cloth that you use to clean the showcase glasses once and then you throw it away. But what if it can be made into something else more worthwhile…Playing around with my pink knit cami I came up with this scarlet that is great to be worn when it is not very cold but still chilly. No machine sewing skills required for this project because I dont have a machine 😉
Materials Required
– Knit fabric (tubular knit). I cut mine from my cami. You could also cut from any old tshirt. Width 7″ length 35″ totally when cut open at one end. Extra fabric for the rosette (can be a different fabric/color also)
– hand needle and matching thread/ Scissors
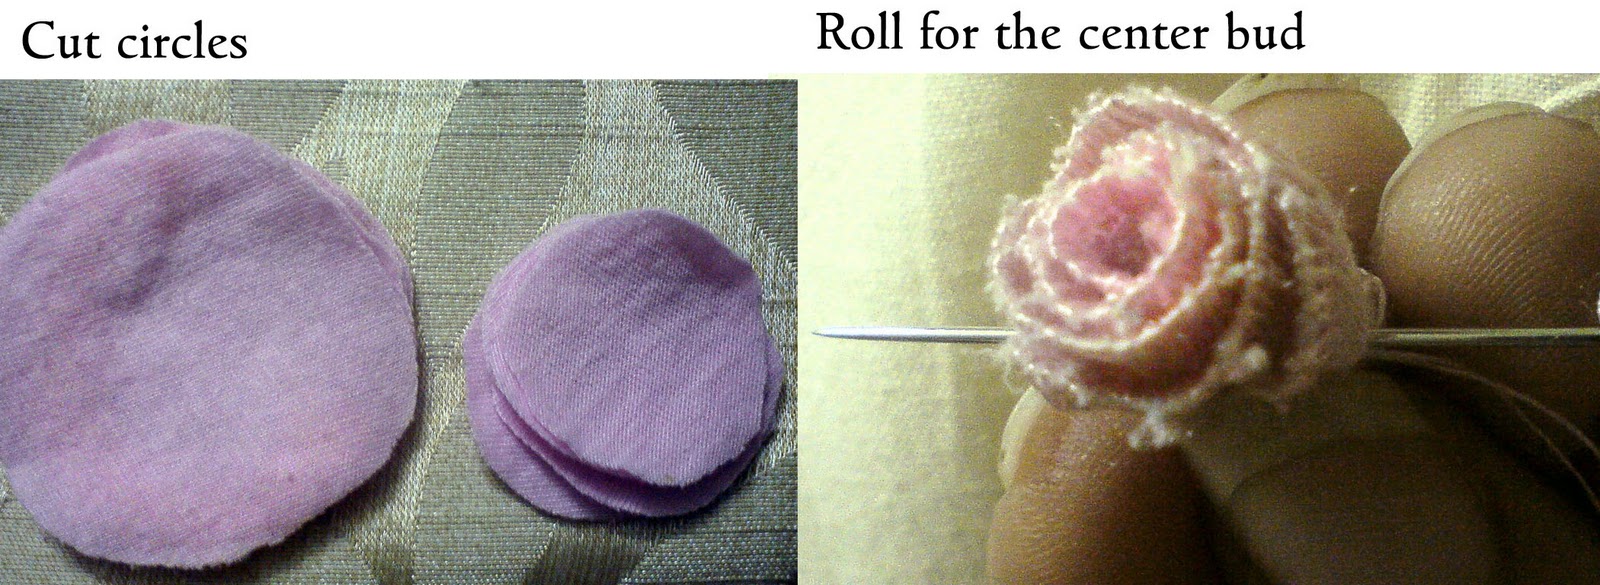
– From the extra fabric cut 5 circles of 1″ diam and 5 circles of 2″ dia. Aslo cut a small strip of 1″ by 6″.
Roll the small strip to form the bud. Secure with a few hand stitches
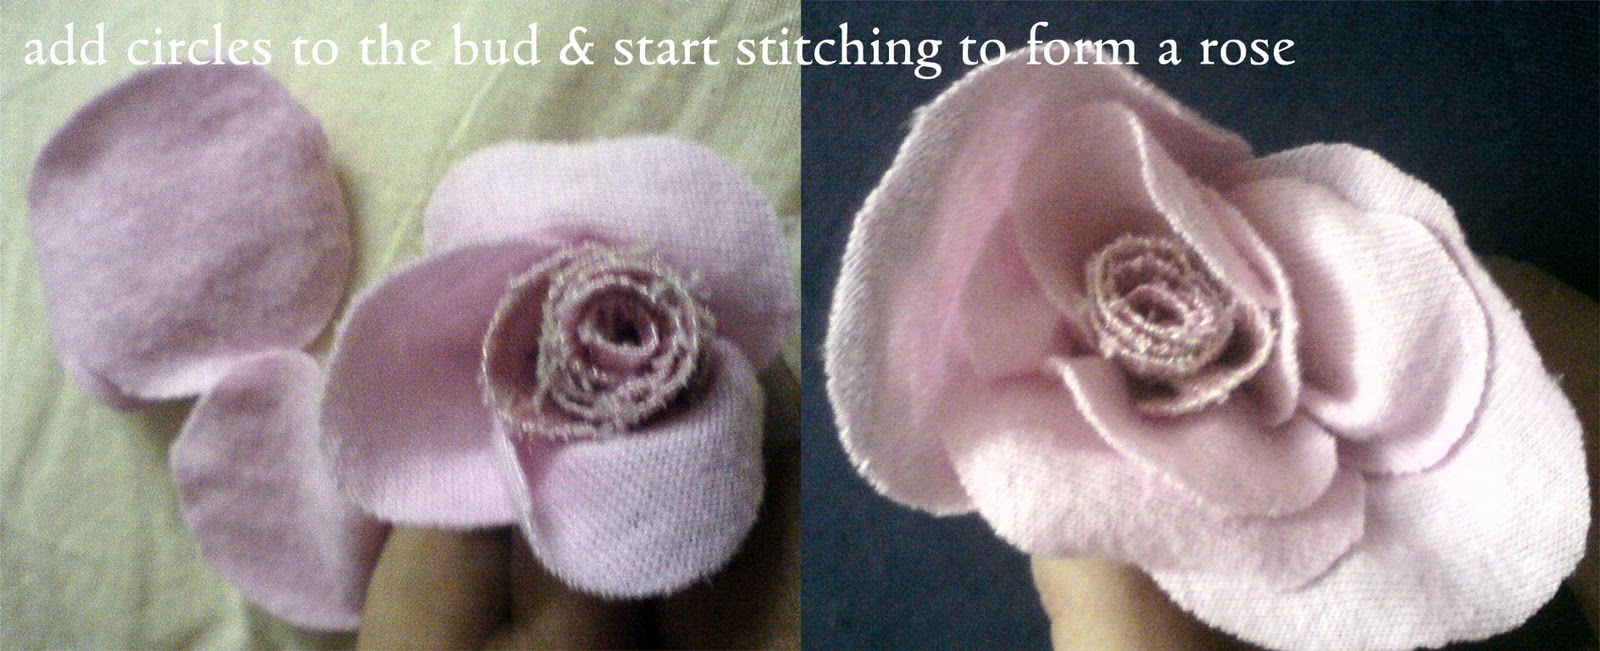 Starting with the smaller circles, add the petals one by one to the bud, hand tacking each petal. Next add the bigger circles. When all the circles are used, turn to the back ,pinch it in the center and stitch through the layers one or twice and secure with a knot. Cut off the thread. The rosette is now done. Fluff it up to give it shape. Keep it aside
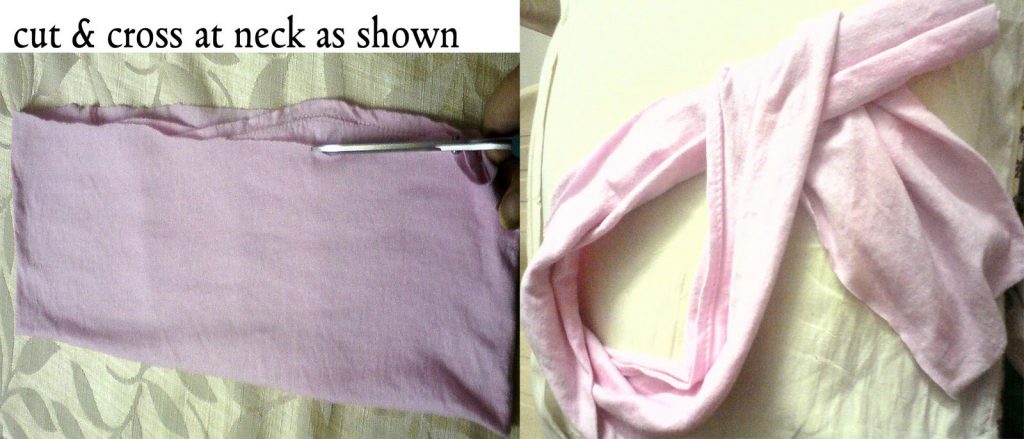
If you cut the bottom portion of the cami/t shirt like I did, you would be left with a tube, cut one end. now when you open it the Width should be 7″ length 35″ totally. Fold it in half width. two layers are required to give enough warmth around the neck.
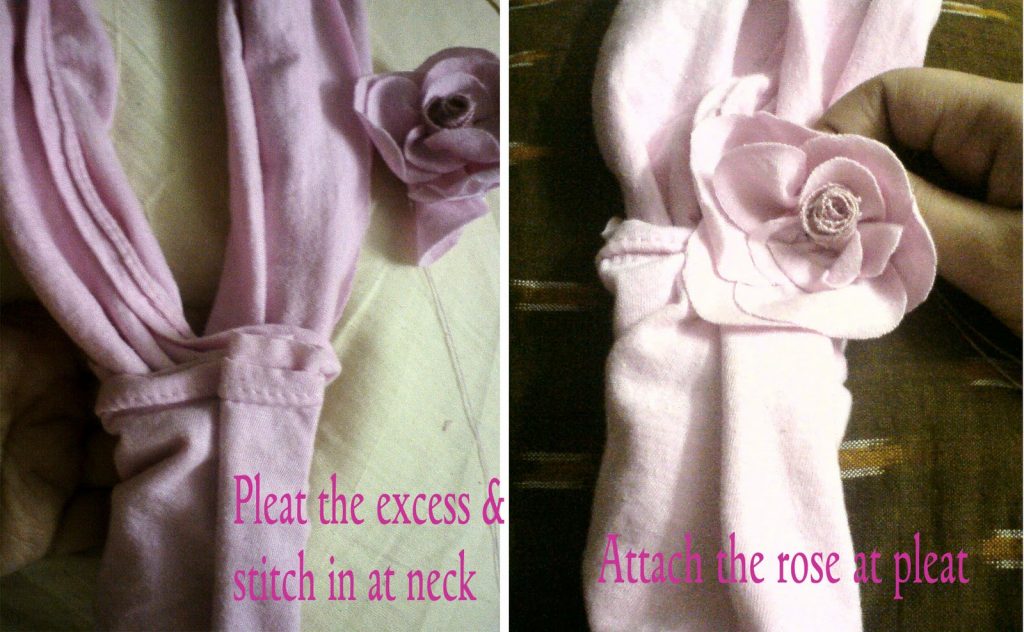
Bring the crossed edge again to the front. Pleat the excess (you will get 2 small pleats) and secure with 2 hand stitches. Without cutting off the thread add the rosette to that point and stitch through it once again. when worn the rosette will cover the exposed neck point.
Thats all..Its done…owing to the stretch of the knit (and the given measurements) it will easily slip through your head. If you head is smaller or if you feel that too much of your neck is exposed you can make the crossing higher. The folded edge of the scarflet around your neck will act like a turtle neck- you can raise or lower(fold it in) according to your requirements.You can hem the hanging edge if you are very particular (actually not required). Instead of the rose you could even add a clip/ pin or a cameo brooch to make a variation.
Another Variation : Stitch together the pleats without adding the rose on top. Convert the rose to a pin by adding a pin back at the back covered with a piece of felt. Now your rose can be just pinned on to the scarf or can be worn with something else, as you please.
Try making it (its takes only 15 minutes). It could make a great valentine’s day gift too.
Cheers
Divya N
Leave a Reply