
Jewels of Sayuri blog Page views all time history on April5th, 12PM IST – 100,003 !!!! Thanks a lot to all of you for helping me reach the one lakh mark 🙂 🙂 🙂
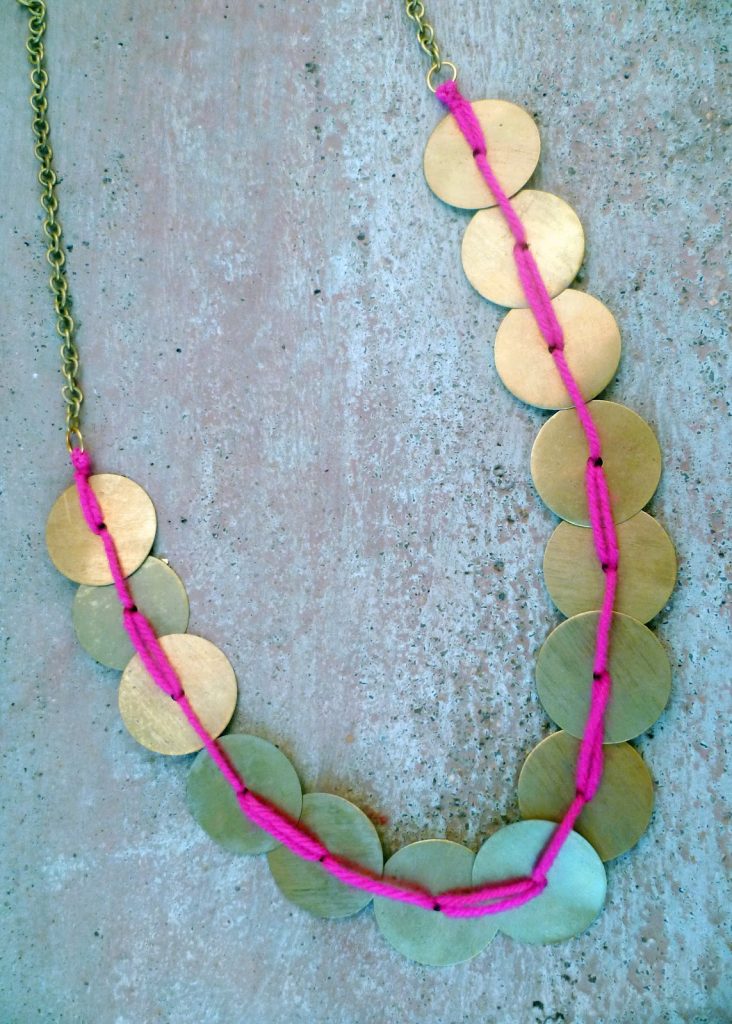
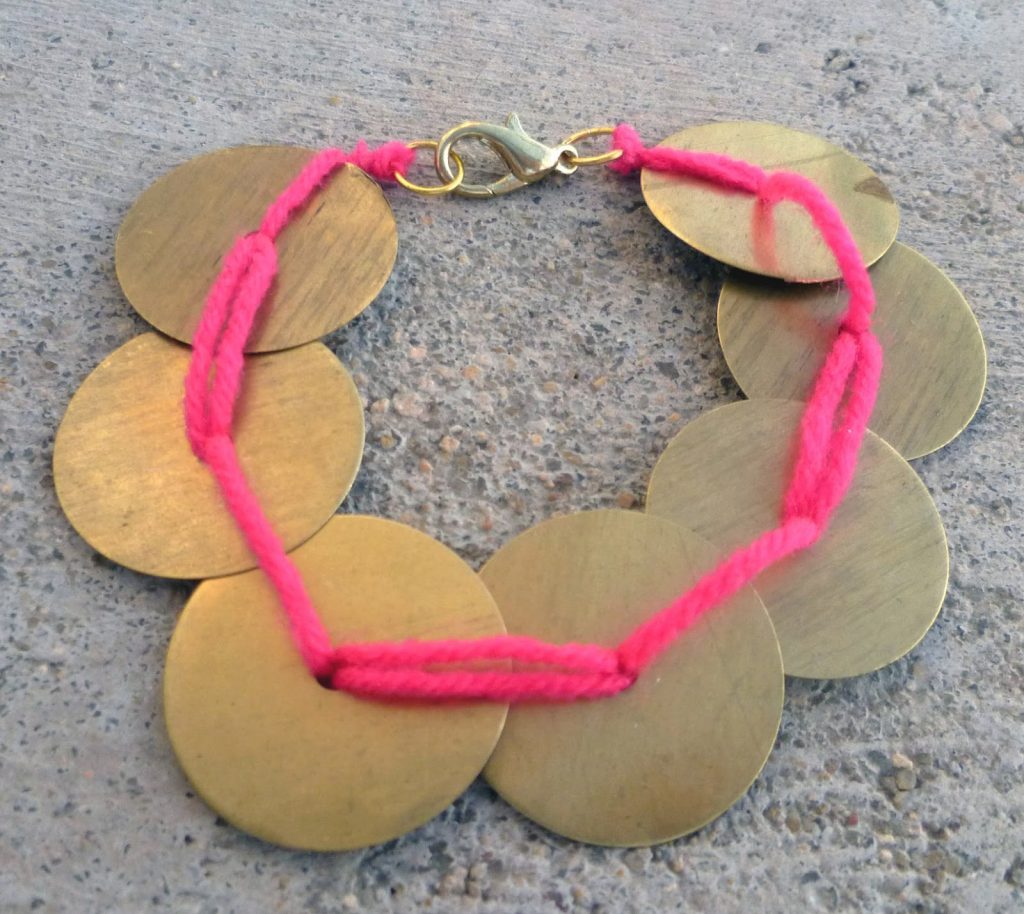 My design collection at college was based on Indian saree borders. As ornamentation I wanted to use metallic discs. At first I bought brass discs then I realised the acrylic ones were much lighter and easy to sew on. So the brass discs were completely forgotten for 5 years, until now, when I rediscovered and decided to make jewelry out of them. I made a set – Necklace, bracelet and earrings, using the coins, some wool (again college supplies) and chain. Here is the tutorial to make the basic necklace/bracelet design.For some of you, it might bring a sense of Deja’vu for it looks a lot like the washer necklaces doing rounds on the internet. However in my version, because the hole size is normal I have used wool and so the knotting pattern is very different and there is no overlap of coins in my design.
 Materials:
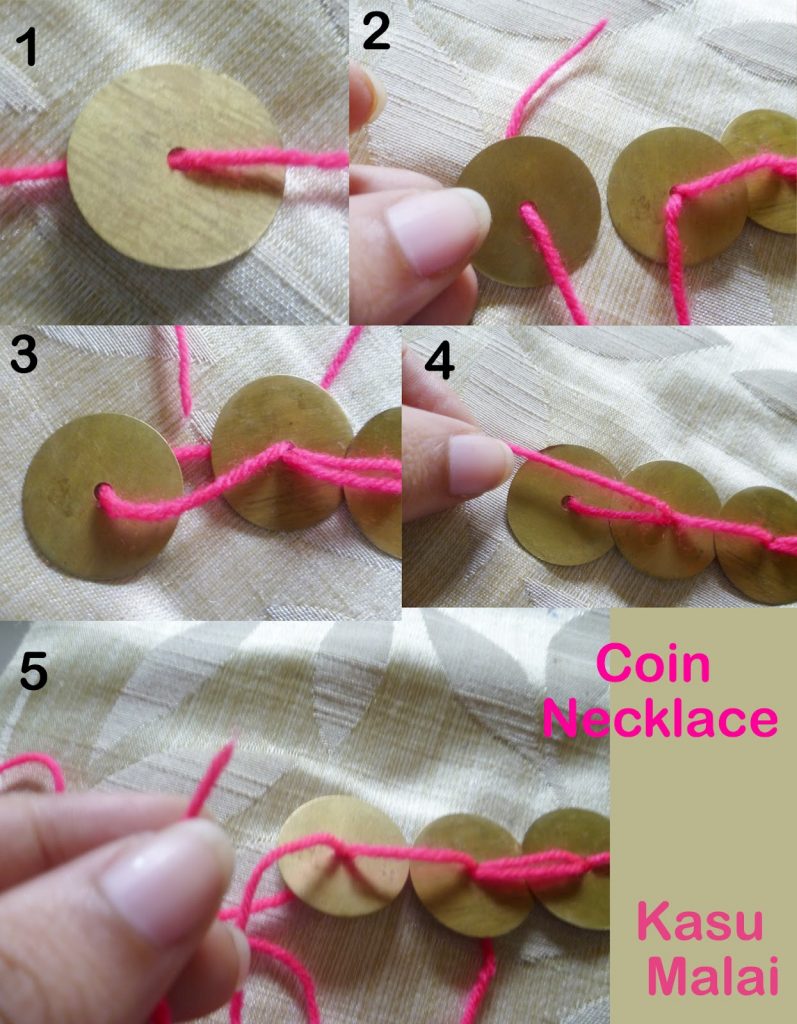 – jump rings (2)
2) pass through the next coin from front to back and then through the previous disc making sure that the discs dont overlap
3) – 5) Keep alternating the cord till the front looks like this – the cord will pass through the first set of discs once and through 2 and 3rd disc twice, again once through 3-4 and twice from 4-5. The back will have the reverse pattern.
(the numbers mentioned here are disc numbers and not step numbers from the picture)
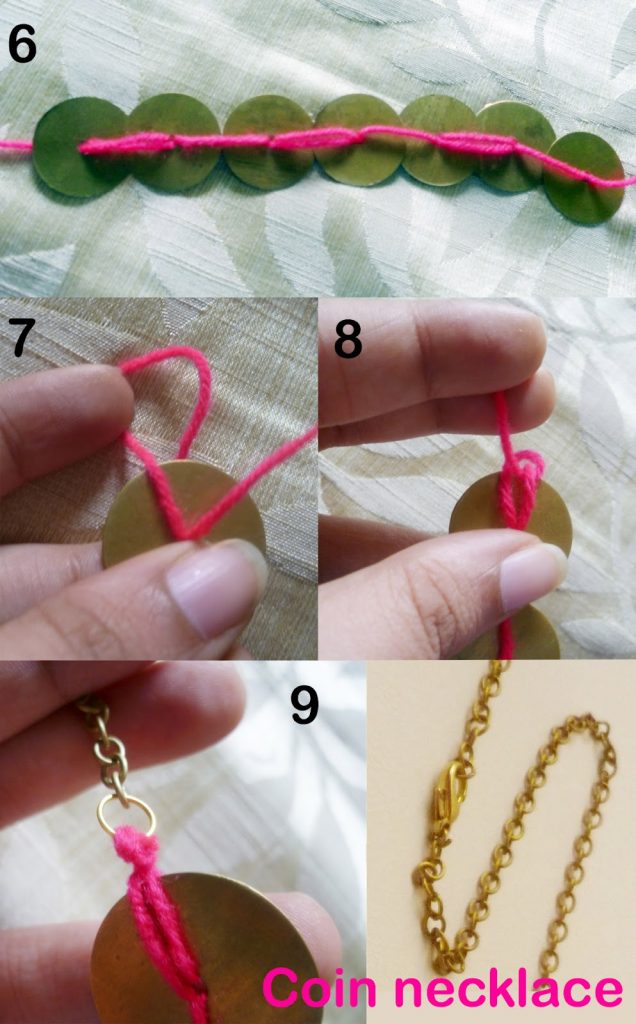
9) Knot the excess cord to the jump rings using the above process. Dab some fabric glue to keep the ends from coming out. Repeat the same on the other side.
Its done.
The narration sounds complex, but once you start working on it, you get a hang of it easily. Yes it does take time and a lot of patient so if you are the instant gratification type, I suggest that you start with a bracelet and only then proceed to the necklace

Leave a Reply