
Here is a simple DIY tutorial to make a multistrand bracelet – Hakua Beaded Bracelet. Its a very quick project that can be done in 10-15 minutes and can be made with just about any type of beads.
Hakua in Japanese means chalk and drawing with white and colored chalk on blackboard/greenboard during festivals and celebrations at school is one of my favourite school memories. As I used to draw well (freehand) it usually fell on me and couple of my friends to decorate the class (usually last minute) during festivals or important celebrations. Since going out to the store would be out of the question, we would resort to drawing and writing on the board. It would be beautiful to look at and with a heavy heart we would erase them out the next day, leaving streaks of green, yellow and brown over the board. This Bracelet is inspired by those memories and those iridescent streaks of color
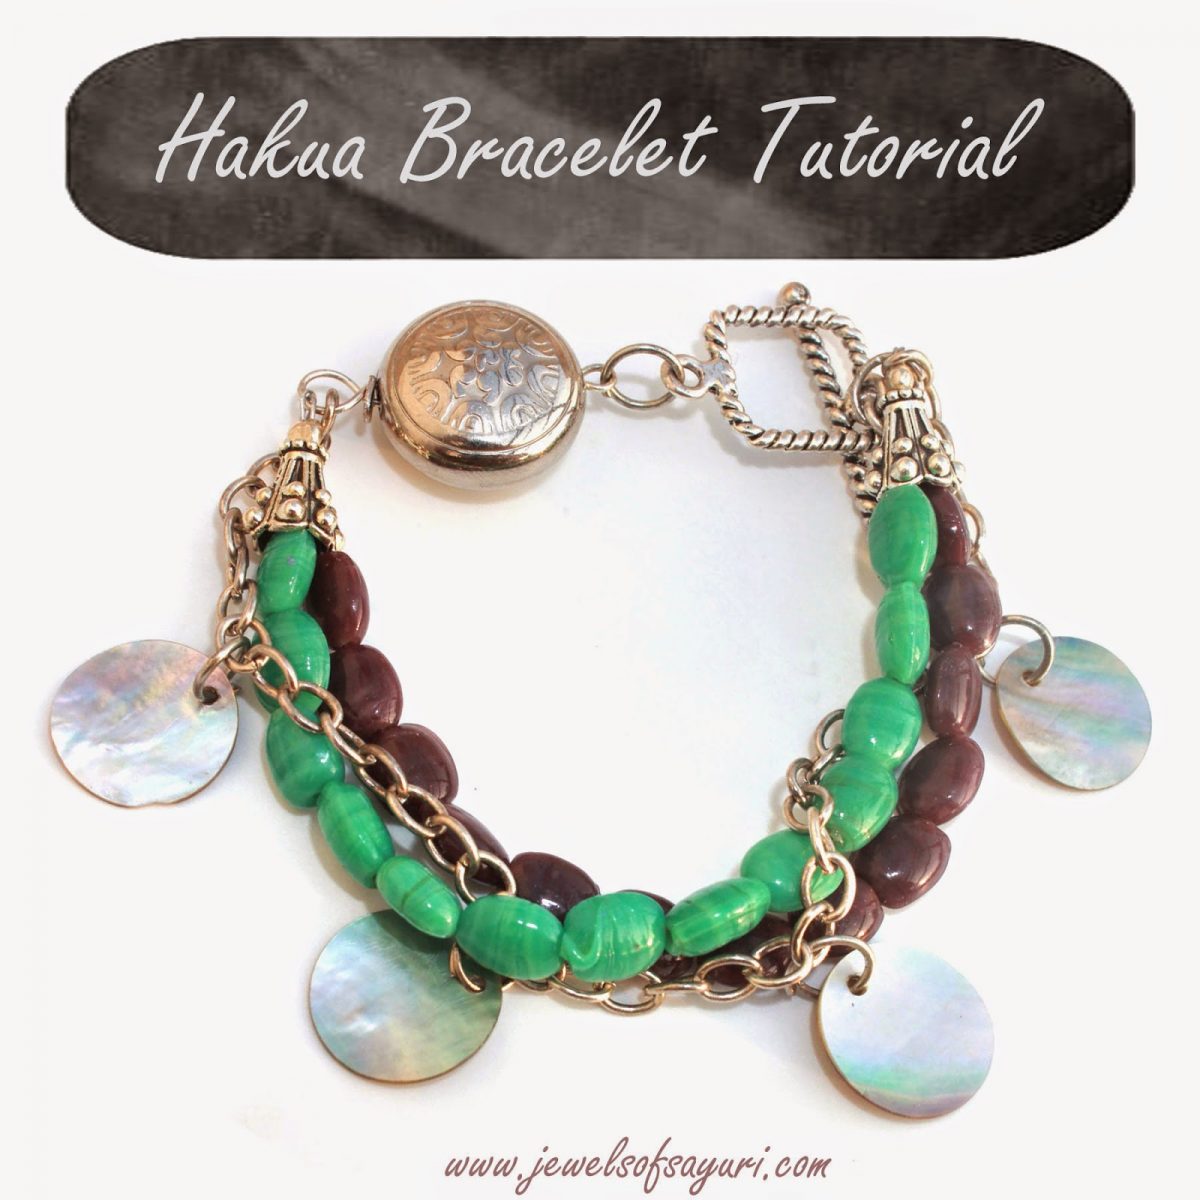
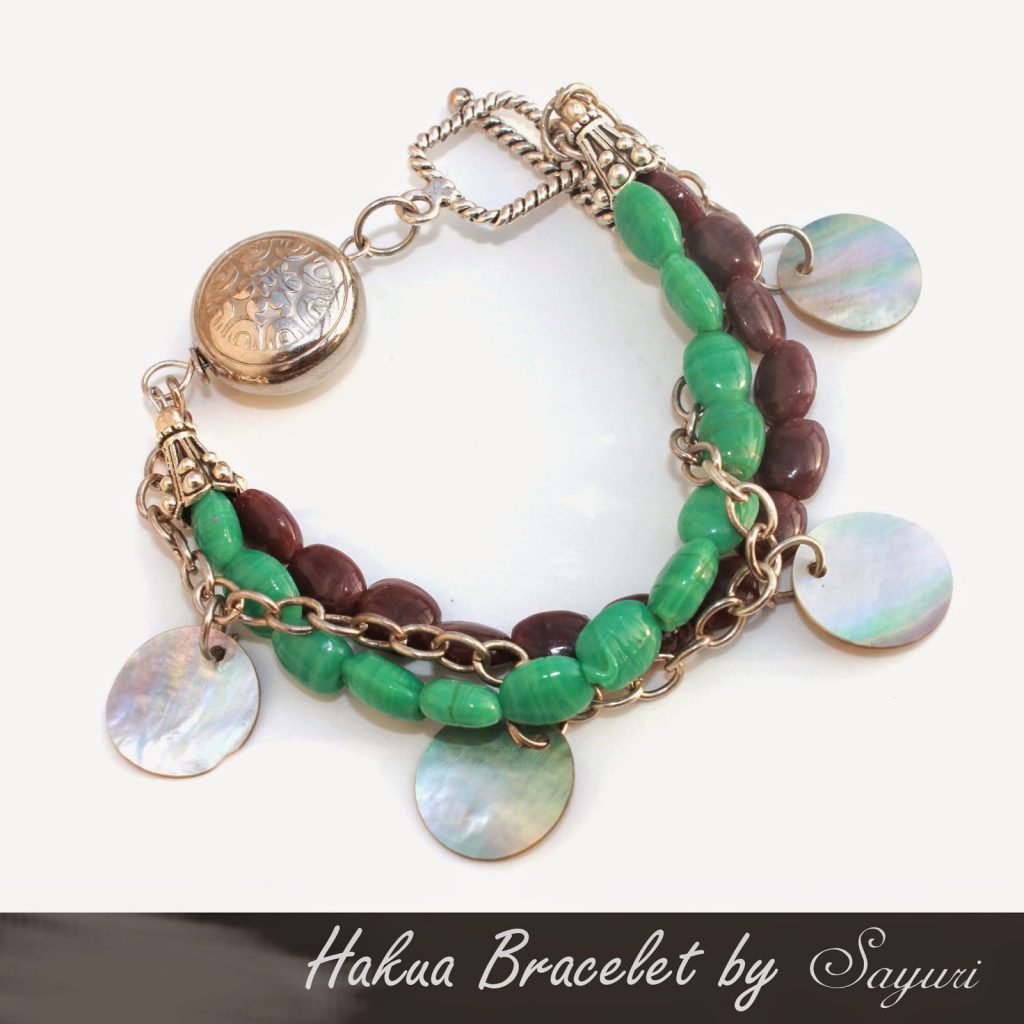
Hakua Beaded Bracelet – Tutorial

Materials Required:
(all findings in Silver tone)
13 sea Green beads
13 purple river Beads
4 Mop (shell) rounds
1 Metal Bead
Chain
2 Bead cap
1 Toggle clasp
7 Jump Rings
4 crimps & 2 crimp covers
Crimp pliers
Tools: Nose pliers, cutter
Method:
1. Convert all 4 MOP coins into dangles by adding them to jump rings
2. Add silver bead to a 2” eyepin with premade loop at one end and make a 3mm wrapped loop at the other end. Connect the toggle of the clasp to the premade loop using a jump ring. Set aside.
3. Cut beading wire into two. Use one half to string 13 sea green beads, and the other to string 13 purple river beads.
4. Thread both wires through bead cones at either ends, crimp both wire together at either ends – one end to a jump ring connected to the bar of the toggle clasp and other to the wrapped loop of the silver bead.
5. Connect MOP dangles to the chain at equal intervals. Rope or weave the chain through the beads. Connect one end of chain to the wrapped loop and other to the jumpring with beaded strands to complete the bracelet.
This is just a basic tutorial and you can make many variations with this. Instead of the chain, you can rope the bigger beads with a seed bead strand or make looped dangles with beads and add them instead of the mop coins. If you pick a bigger bead cap or smaller beads, you can do three lines instead of two. I feel that this would be a perfect project for beginners who are looking to explore multi strand designs.
Have a look at my past tutorials here
I hope you find it interesting
Cheers

Leave a Reply