
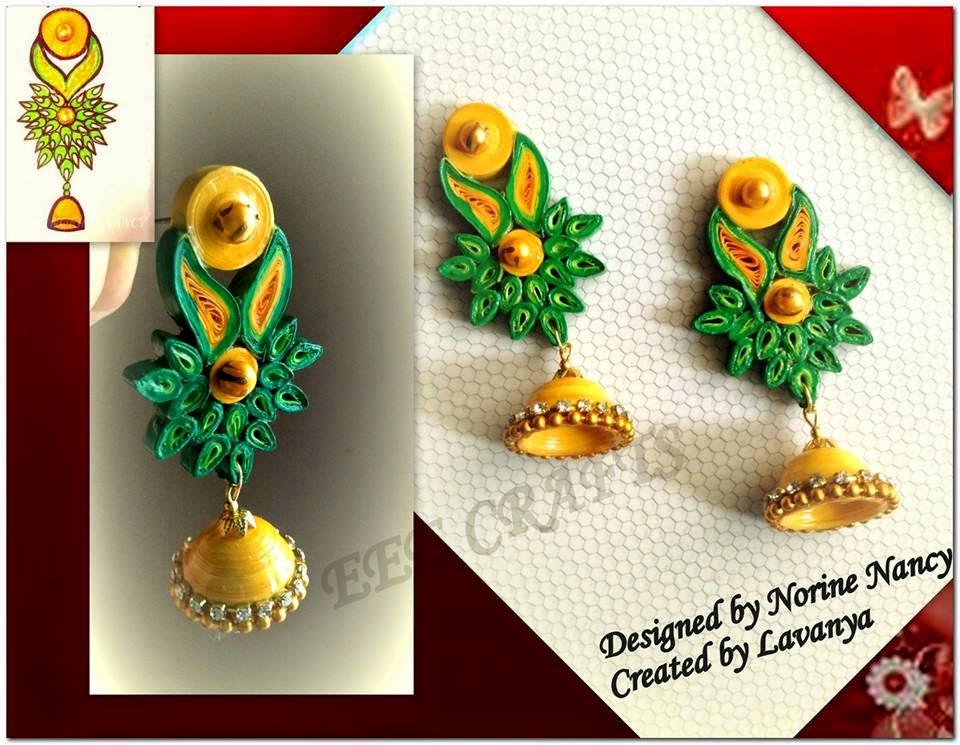
en Lavanya Nallamalli’s facebook page crossed 3000 likes in november last year, she decided to do a very interesting giveaway. She invited readers to send in designs for quilled earrings and announced that the winners would get their designs handmade into products by her. Lavanya is here with us for the next few days, over which she’ll share with us how she created these pieces with 2 step by step DIY tutorials. Over to Lavanya for the DIY quilled Jumkha earrings tutorial
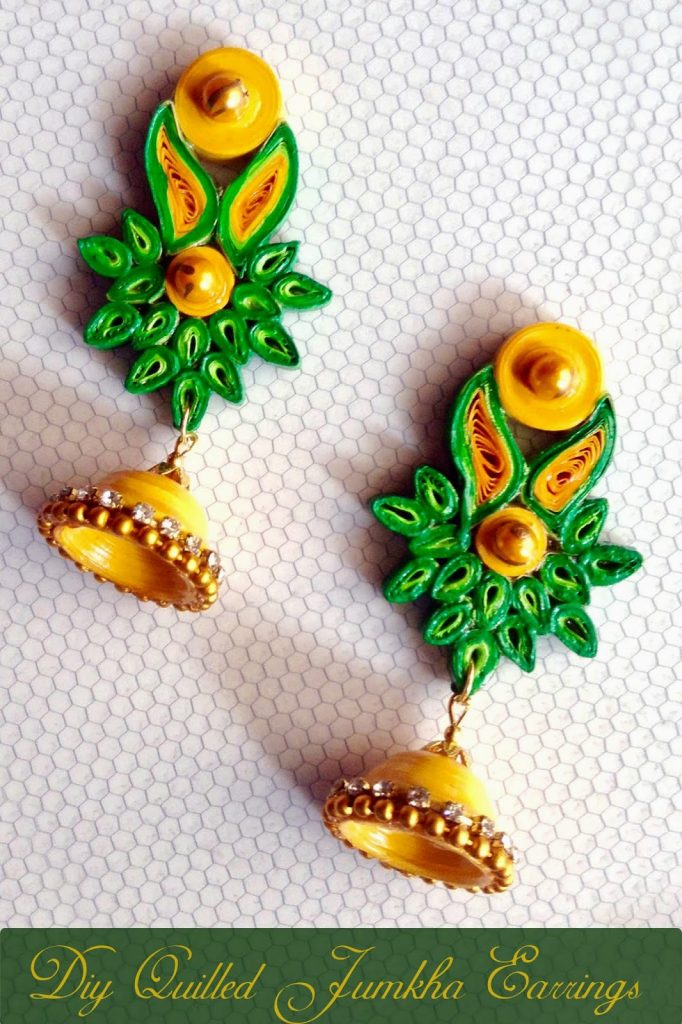
DIY quilled Jumkha earrings
Materials
• Quilling slotted tool
• 5mm strips
• Quilling board
• Jewelry pliers and wire Cutter
• Modge Podge Gloss
• Fevicol (white glue)
• Jewelry Findings : Jump rings, Head pins ,eye pins, Half beads, gold ball chains, Rhinestone chain, Bead caps, Stud bases
Method
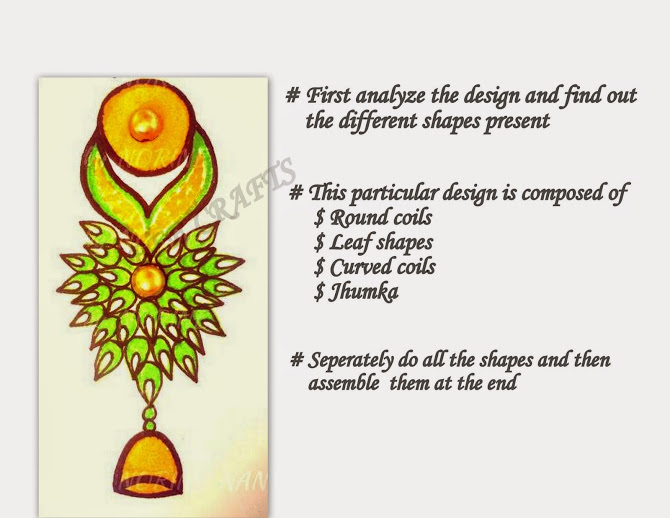
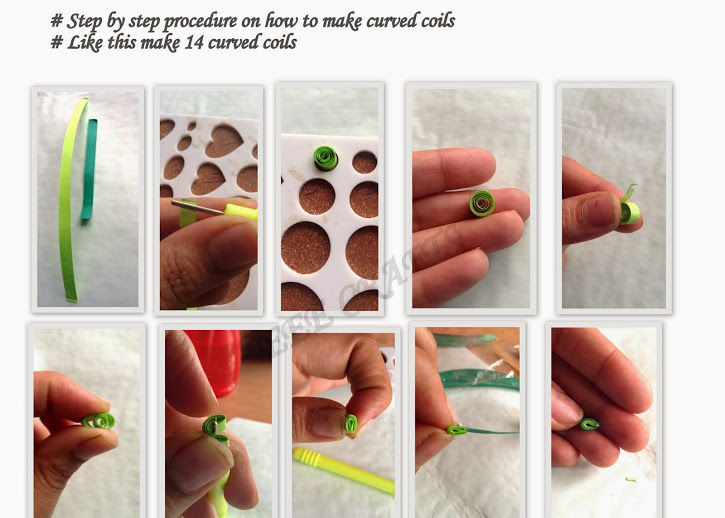
1. Analyse the design and make 14 coils as shown in the above visual.
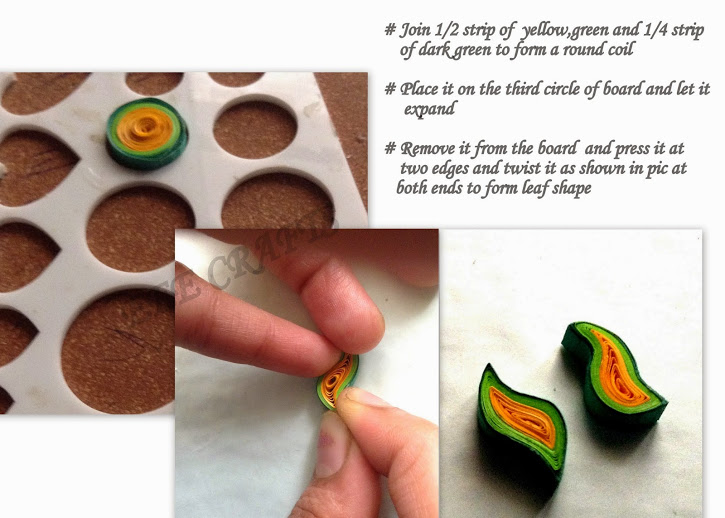
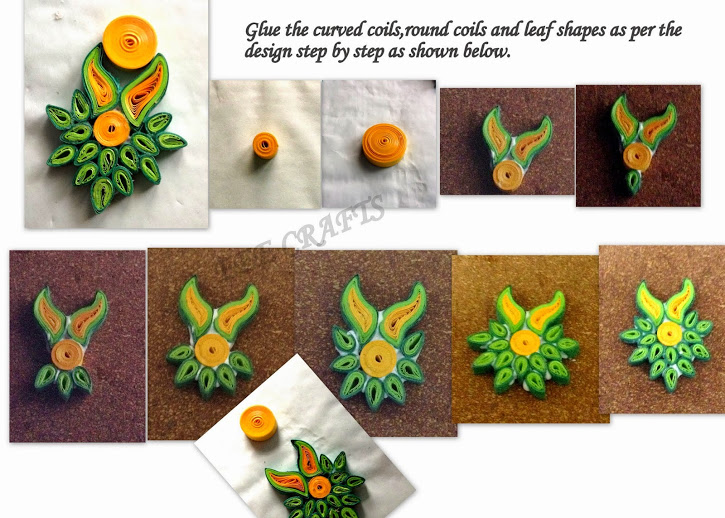
3. Glue the curved coils, round coils and leaf shapes as per the design step by step as shown below
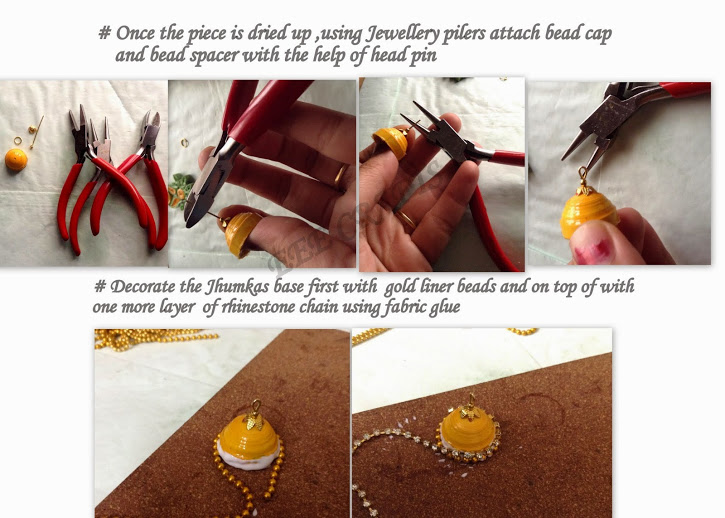
5. Once the piece is dried up, using Jewelry pliers attach bead cap and bead spacer with the help of head pin. Decorate the Jhumka base with gold ball chains and rhinestone chain
6. Join 5 yellow strips to form a round tight coil. Place it on the appropriate size of the Jhumka mould and press it gently to form a dome shape. Apply fevicol inside the dome and let it dry.
7.Using Jump ring connect the upper part of the earring with the Jhumka base with the help of pliers

Divya’s Note: Fabric glue dries clears while fevicol might leave a thin film. They can be used interchangeably or use Mod podge in lieu of both in this DIY quilled Jumkha earrings tutorial
About the Artist: Lavanya Nallamalli is a Computer science graduate who worked as software engineer for 5 years before taking a baby break. During pregnancy when she used to work from home she came across crochet tutorials of baby accessories on the internet and started making crochet gifts. When her little one grew up, she started a home business of crochet baby gift accessories which got extended into crochet jewelry and Quilling jewelry. Find her on Facebook – Crochet4 charity and EEE crafts
I hope you found it interesting
Cheers

Leave a Reply