
Let me open with the disclaimer that I am not a tutorial expert and there are people who are far more experienced than me when it comes to writing design instructions. But as someone who has been writing DIY Jewelry and craft tutorials for both web as well as print, I thought I’ll share my learning with everyone. 
Contrary to what people think creating a DIY tutorial is a hard job. It hard enough when you get paid for it but harder still when you write it for free on your blog. You need to come up with an original idea (that well, will work!), create it, document it every step of the way using photographs, edit the photographs and then write the tutorial. That is just the first part; the second part is promoting it, responding to comments, answering questions, and updating it as you go. Also, tutorials are slightly different from “How to” posts such as this one, in the sense that there is a definite product/ process that results from following the tutorial and how to is just a series of steps leading to varied results.
When I started writing tutorials for my blog, I thought if everyone is doing it, why can’t I, it must be easy after all. I learned the hard way, that there is a big difference between writing a tutorial and writing an excellent tutorial and I cringe when I look at my old posts. So in this post, I’ll talk about the elements that make a tutorial stand out in a great way.

1. Show Finished product images:
This might sound like a no-brainer but there are hundreds (maybe 1000s) of tutorial on the net that do not show clear pictures of end products. Some of them have such tiny pictures in all sorts of fancy frames that I cannot see the details. Personally, I cannot follow text instructions and learn how to make a product just by looking at the final picture and the material list. I look at the step wise pictures, only if the product is very complicated or if the final product image is very small.
Also post at least 2 pictures (one full image showing the back, clasp or hook) and one close up. They must be in large size – one landscape and one portrait preferably as it makes your tutorial easily shareable across social media channels. Showing how the item is being used is an added bonus, though not a must.
2. Write a Detailed material list
The craziest part about writing for magazines is that they want a super detailed material list. Interweave specifies that name, size, finish, number, measurement and supplier name must be mentioned for every single consumable that it used. Also, all tools and equipment must be listed. When you write online, it doesn’t have to be that specific but it is good to have a clear material list so people know what exactly they need to create the item. When using Affiliate links, do not flood the entire list but use them only when the item is specific or uncommon as a courtesy.
3. Take Step by Step pictures
A Majority of the craft world seems divided on this. Many say that a great tutorial must show every step (video tutorials might work better in that case) while others say that pictures showing the important or complicated steps are sufficient. I follow my “N-4 or above” rule for tutorials. That is, if there are 10 steps, I show a minimum of 6 steps visually. They can be separate images or a collage provided the images are clear and big enough. A tutorial is no place for tiny fudgy pictures. The idea is that a person who does not understand the language (in which the tutorial is written) must be able to comprehend the making process, with just a rudimentary knowledge of the field.
4. Offer material or technique alternatives
When we write for an international audience, we must keep in mind that materials that are easily available to us might not be available to them. So suggest alternatives. For e.g, if the material list says Swarovski crystals, mention that it can also be created using glass, plastic or coated Chinese crystals. If the tutorial uses artistic wire mention how it can be created using base metal or other coated/plated wire. It might seem self-explanatory to an experienced person but a beginner coming across your post will require that support and guidance.
5. Discuss design Variations
Unlike Print, when we write for the web, basic courtesy demands that we discuss variations of the suggested idea. Apart from curbing plagiarism, it will encourage people to use your tutorial as a starting point to create new ideas and products.
Though there are many more good practices, I feel that the above five are an absolute must while writing a DIY tutorial. As a bonus for all you tutorial newbies out there, here is a sample DIY tutorial template that I follow for every tutorial of mine. It is not restricted to jewelry making or crafts but can be adapted to any set of design instructions. So do download and share!
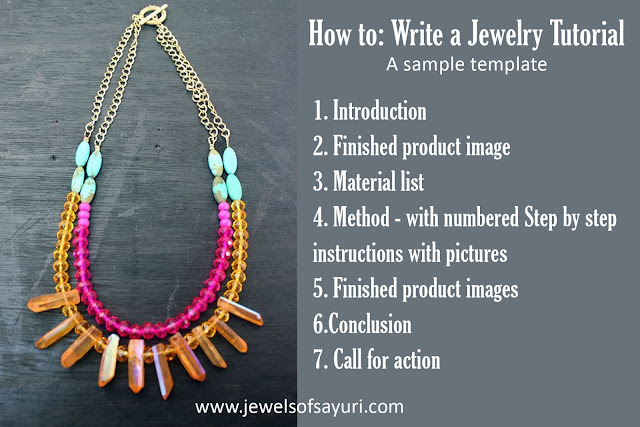
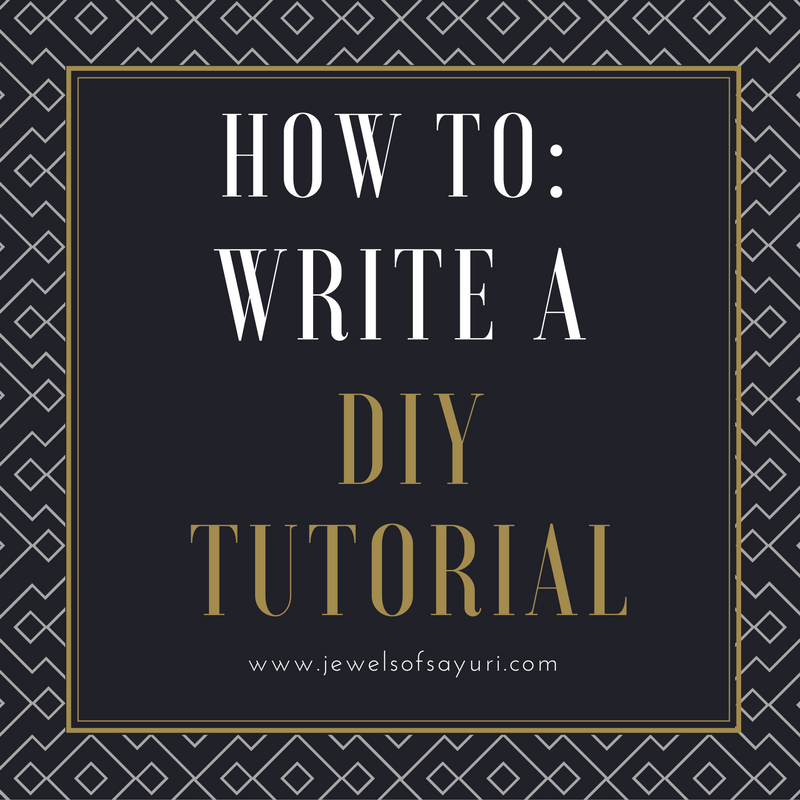
How to: Write a DIY Tutorial
A Sample Template
1. Introduction: Background of the design, your inspiration, how you chose the materials and what is the application of the idea or design
2. Finished product image no. 1
3. Material list, Material image optional
4. Method – numbered Step by step instructions with pictures
5. Finished product image no. 2, 3…..N
6.Conclusion – Summary if required (for complicated designs), any problems that you faced in the process and how they can be resolved. Add tips, suggestions, and variations. Add additional images if you have them as variations.
7. Call for action
That’s it for today folks, do add your tips on how to write a great tutorial in the comments section and tell me what you think of my tutorial template. If you find the template useful, please share on Social media (twitter, Instagram or Facebook) by tagging it to @jewelsofsayuri
I hope you found it interesting
Cheers

Leave a Reply