
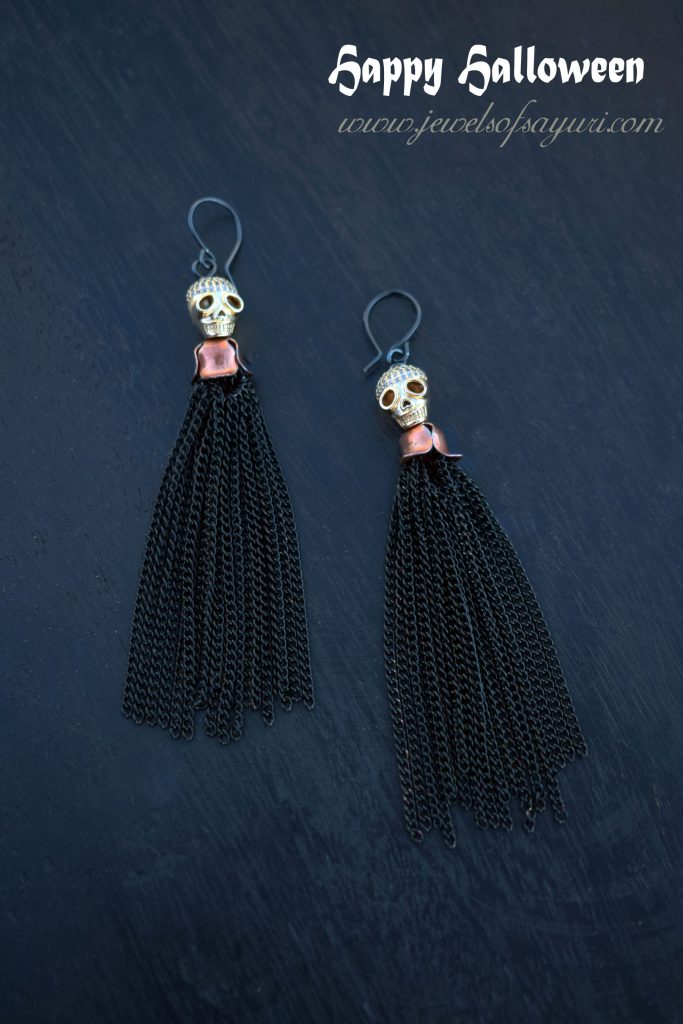
Every month, Sarajo Wentling hosts the Honey do list challenge where her husband Eric gives her an inspiration picture to work with. For October he has picked the Hops Astronomical Clock in Zatec in the Czech republic which is replete with imagery. Three things caught my eye in the picture. The Striking gold colour was the first; the Skeleton and the Gemini sign on the clock were the other two. So I decided to put them together and create twin skeletons with a gold accent. Thus was born the idea of my Skull and chain tassel earrings.

Skeleton and tassel earring..huh?
Okay, I know what you are thinking. Skeletons have legs, duh! But that is just the western context. However, If you like me have grown up taking a one eye closed, one eye open peek at Vittalachariyar movies like Jaganmohini and C grade Indian ghost movies a your friend’s houses when their parents are not at home you would know that some ghosts do not have legs. Even skeletons don’t. That is what makes them scary. Booh!!

Skull and chain tassel earrings – Tutorial
Materials
Brass Micro Pave Cubic Zirconia Beads, Skull, Real Gold Plated, 11×9.5x9mm – 2
Unwelded Iron Curb Chains, 3x2x0.6mm, Black
Copper flower bead cap/tassel cap – 2
Black artisan wire – 20g
Tools – round/stepped nose pliers, wire cutters, scale or measuring tape
Method
Decide how thick you want your tassel to be. Fuller, thicker tassel like this one means that the earrings would be heavy. To make them lightweight simply reduce the number of chains used. The Black chain and the skulls can be bought at Cobeads.

- Cut a 7 cm length of black wire and using your step nose pliers, make a loop at one end, leaving a tail long enough to make 3-4 wraps.
- Cut the black chain into 20 pieces measuring 15 cm. Divide them into two sets – one for each earring of the pair
- String the center of the chain pieces into the wire (loop). One the 10 pieces are in, wrap it shut.
- Add a copper flower bead cap and a skull bead and loop

5. Cut the bottom edge of the tassel. I chose to add my chain and then cut the bottom edge for I wanted a more fuller (uneven) tassel. If you want all of them to line up like a blunt cut, measure and cut the exact length before. Also, like I mentioned before my tassel is heavy, if you want it lightweight use lesser lengths of chain.
6. At this point add earhooks to complete the earrings. I made my hooks using Artistic wire. It is a good idea to always give a little bend at the end (as shown in the second hook) so that the earring stays put in your ear without a stopper.


16 responses to “DIY Skull and chain tassel earrings”
Love these! Like you said, statement pieces that can go goth, fancy or casual. Great.
Thanks Ann…yup they look really stylish when worn.
Even though I have some reserves with regard to Halloween themed jewelry, skulls and such, I think these look stylish, indeed! I like that there are three elements in three different colors and how you used the opportunity to make a nice little tutorial!
While I hate any and every other part of human body as jewellery, I seem to like skulls. Thanks for noticing the mixing of metals and colours. I hoped that it would make the piece very in-trend.
I had to check twice to reassure myself that these are really yours :))
What a fun tutorial!
Haaa…Ok… I am not sure what that means. But they are mine. Before I rediscovered Indianess as a part of my design aesthetic, I was (and still am) very punk in terms of my design aesthetics
These are so cute, and the timing of them is perfect! It took me a second to realize how Gemini played into your design – but then I remembered – TWINS! Ha! Your directions are concise and clear. I’ll be sharing this tutorial if you don’t mind. I think it’s great! And, you reminded me that I didn’t think hard enough about the skeleton in the photo as this post reminded me of some skull bone beads I have and am not sure how to utilize. A play on your tassels might be just what those skulls need 🙂
Thanks Hope. Please do share the tutorial. Go ahead use this tutorial to make to pairs of earrings. Using a bone skull may add that little extra texture to this idea
Your earrings are so fun! I love the black chain with the golden skulls. Great job on the tutorial too. Thanks so much for playing along with us this month! I hope you’ll check back on November 1st to see what Eric dreams up next for us.
Thanks for giving this inspiration. The moment I saw the clock image, I knew exactly what I wanted to do
Thanx great article, these designs are so stunning for halloween.
Very cool! I love that you did a tutorial to go along with this. Thanks for playing along!
Thanks for the cool inspiration Eric. It was fun to work with it
Lovely. i really love accessories and look forward to your new creations. Just want to have one…looks soo cool.
Thanks Shweta, the earrings are available for sale
[…] DIY Skull and chain tassel earrings […]