
Couple of months ago, Sapthavarna Creations, an UK based firm, conducted an online kolam Contest, Kolothsavam. I participated in it and entered my kolam necklaces under Kolam crafts section and won the prize – a small trophy in outside UK category. I have been making kolam jewellery for my brand, Sayuri since 2017. Therefore, its time I share how I make my kolam necklaces with all of you.
How I make my kolam jewellery – DIY
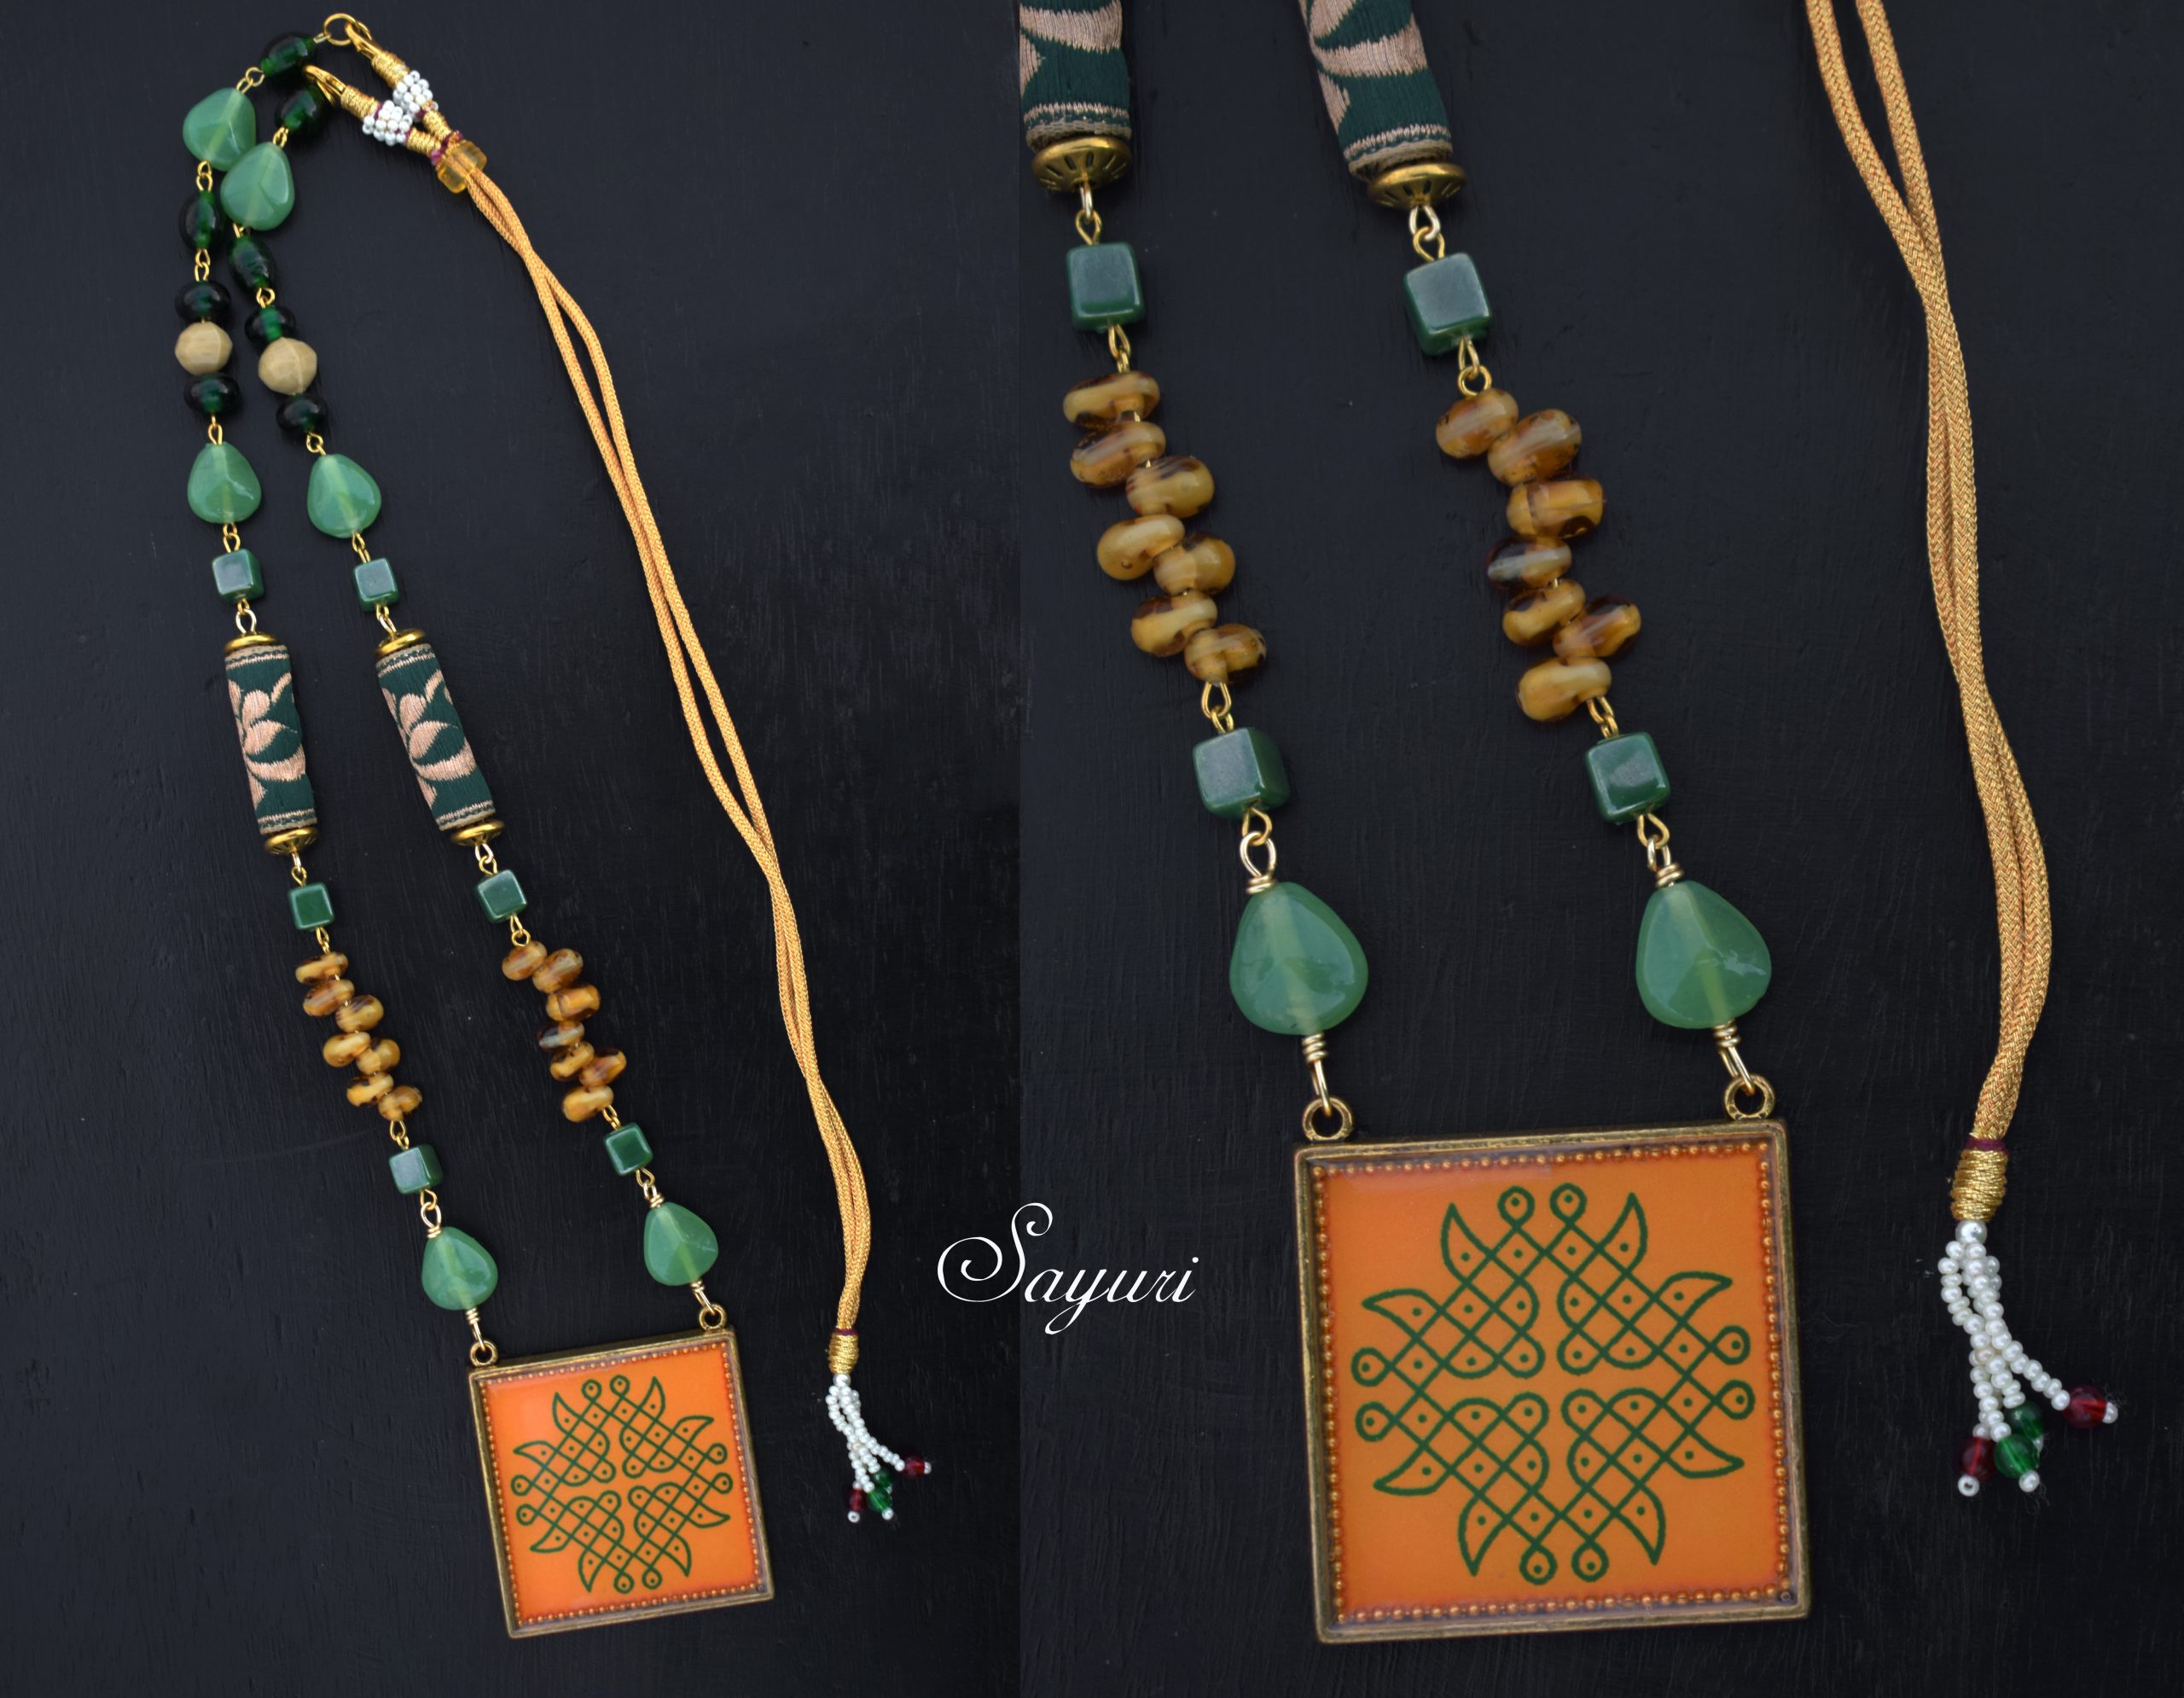
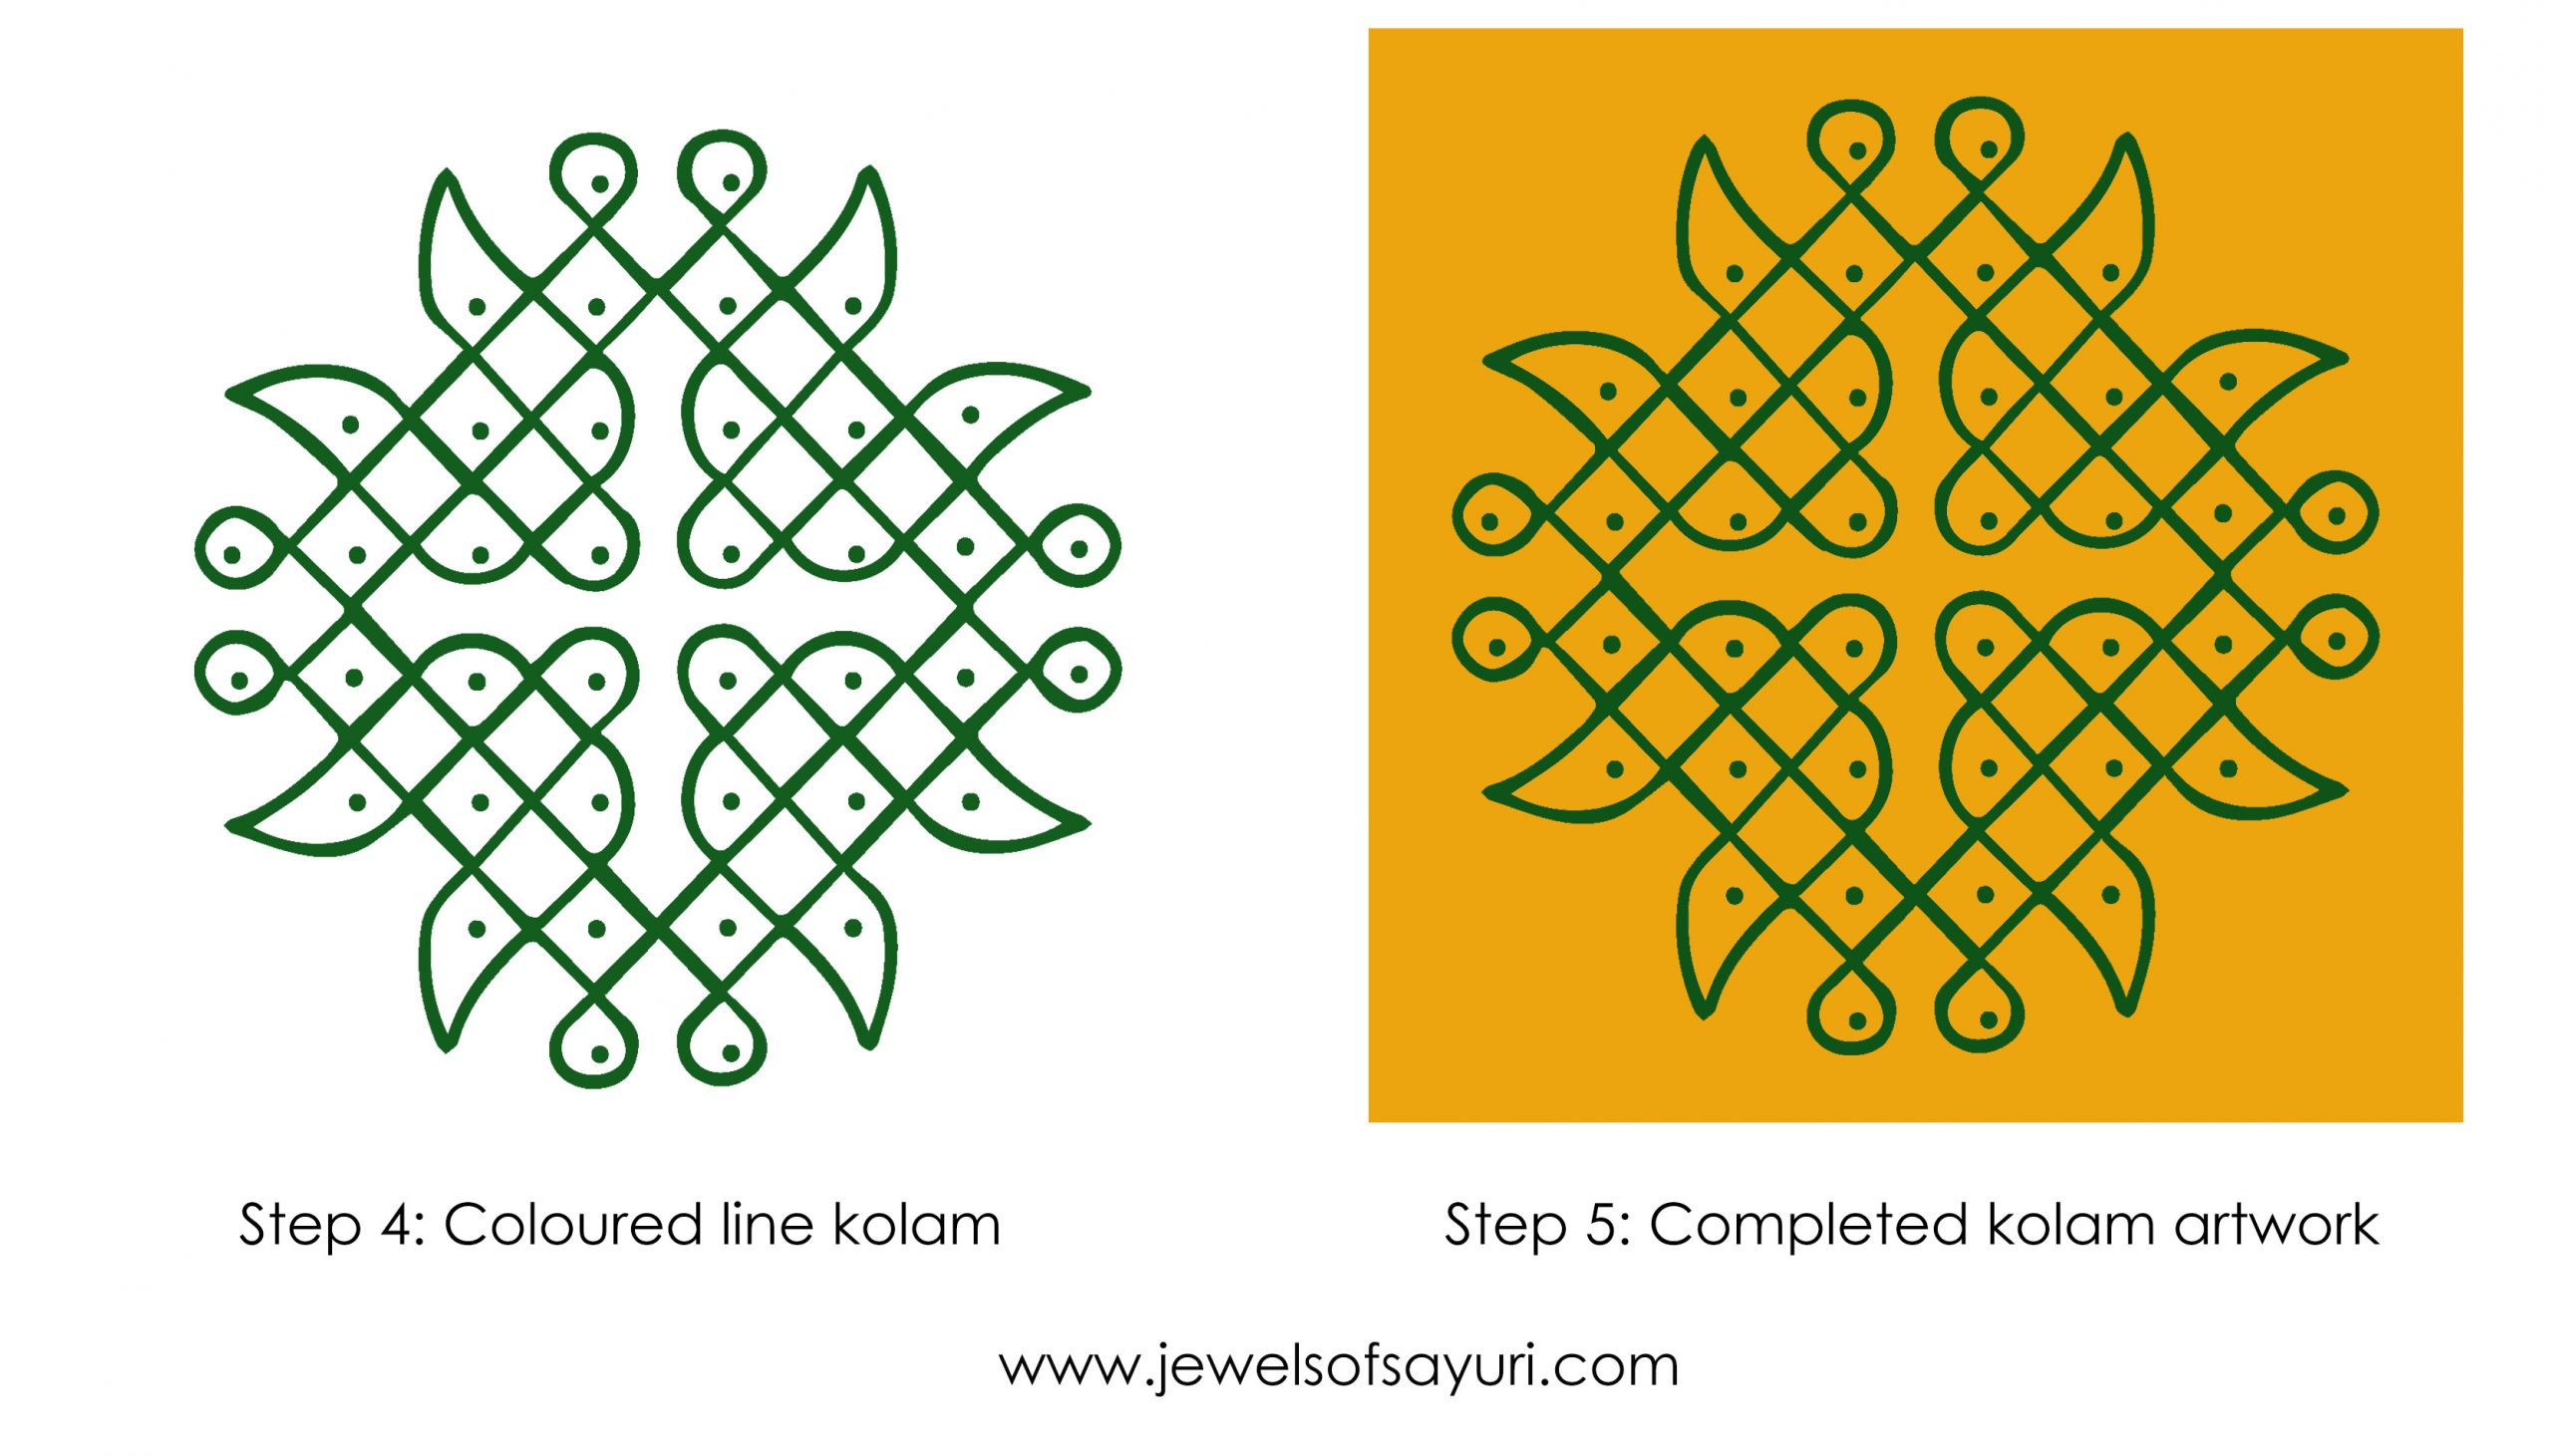
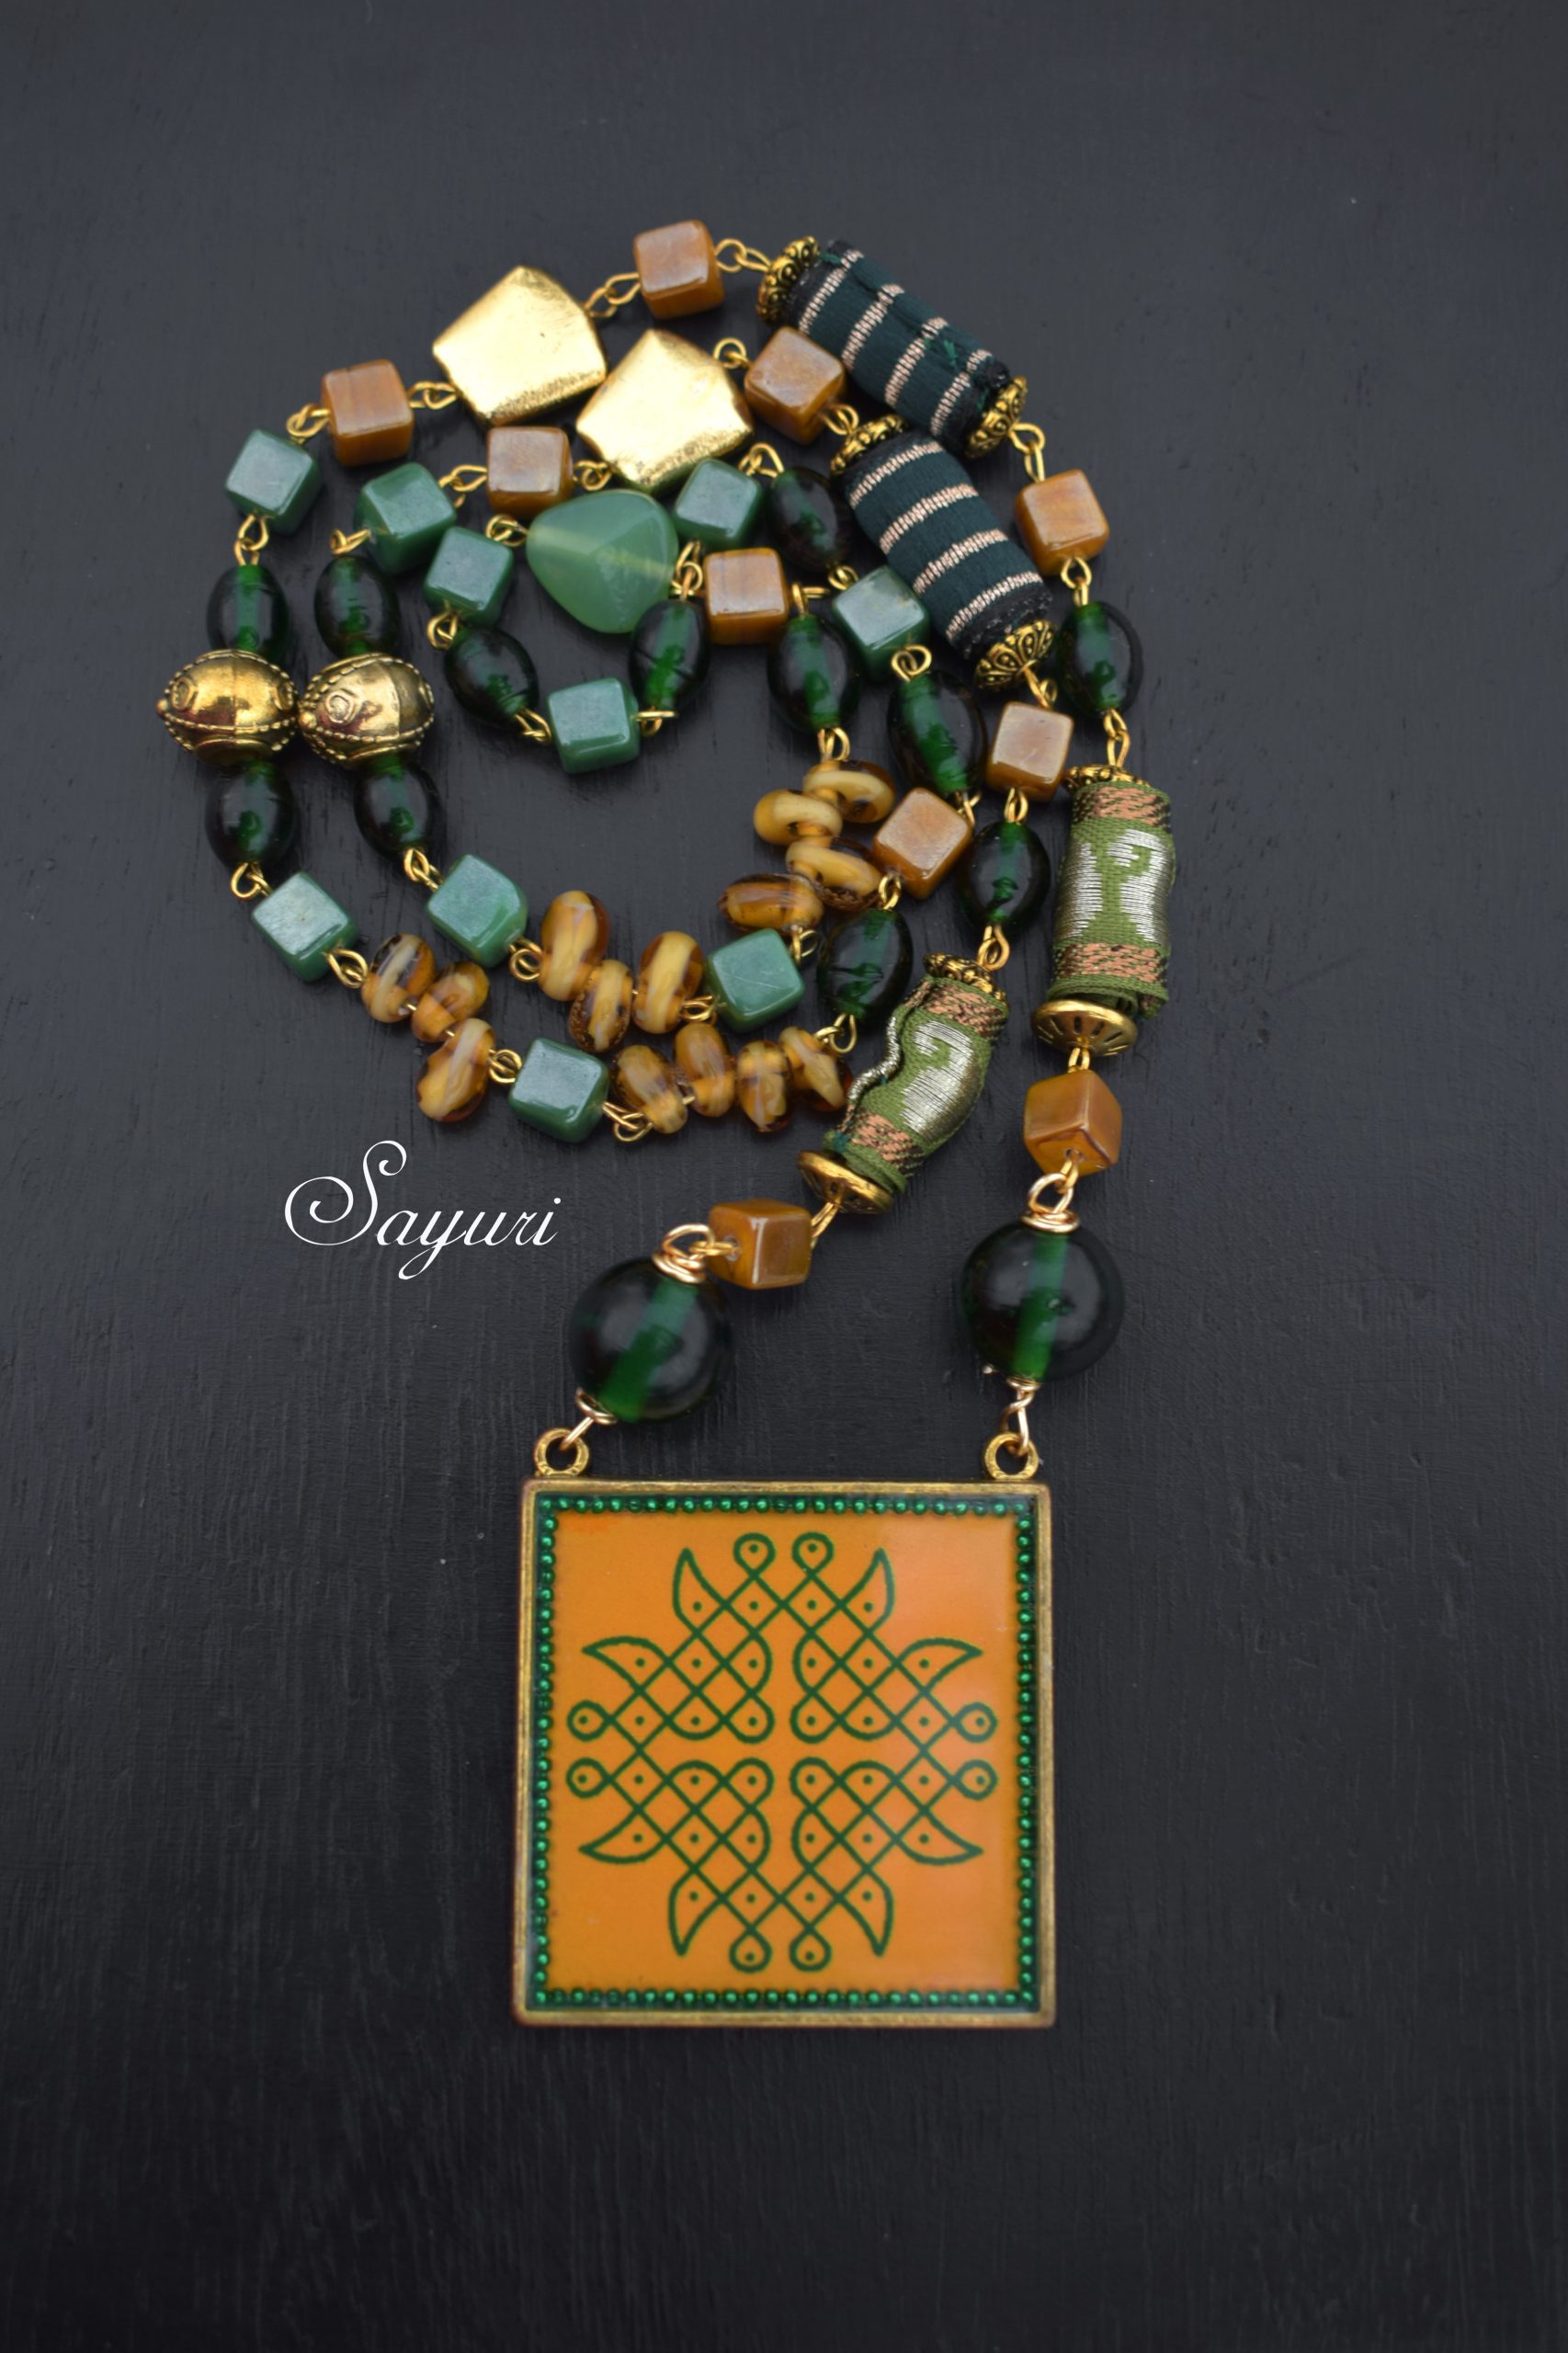
For this contest in the kolam crafts section, I created a personal fashion accessory inspired by pulli kolam. I created an even pulli kolam in Adobe illustrator, which wass then worked upon in Adobe photoshop to create a coloured digital kolam. Using the original print of the kolam image in 45mm square size, I have created a resin pendant using a brass base. I have converted the artwork into jewellery by looping the pendant with glass and fabric beads made by me. Here is the step by step process.
Developing the artwork
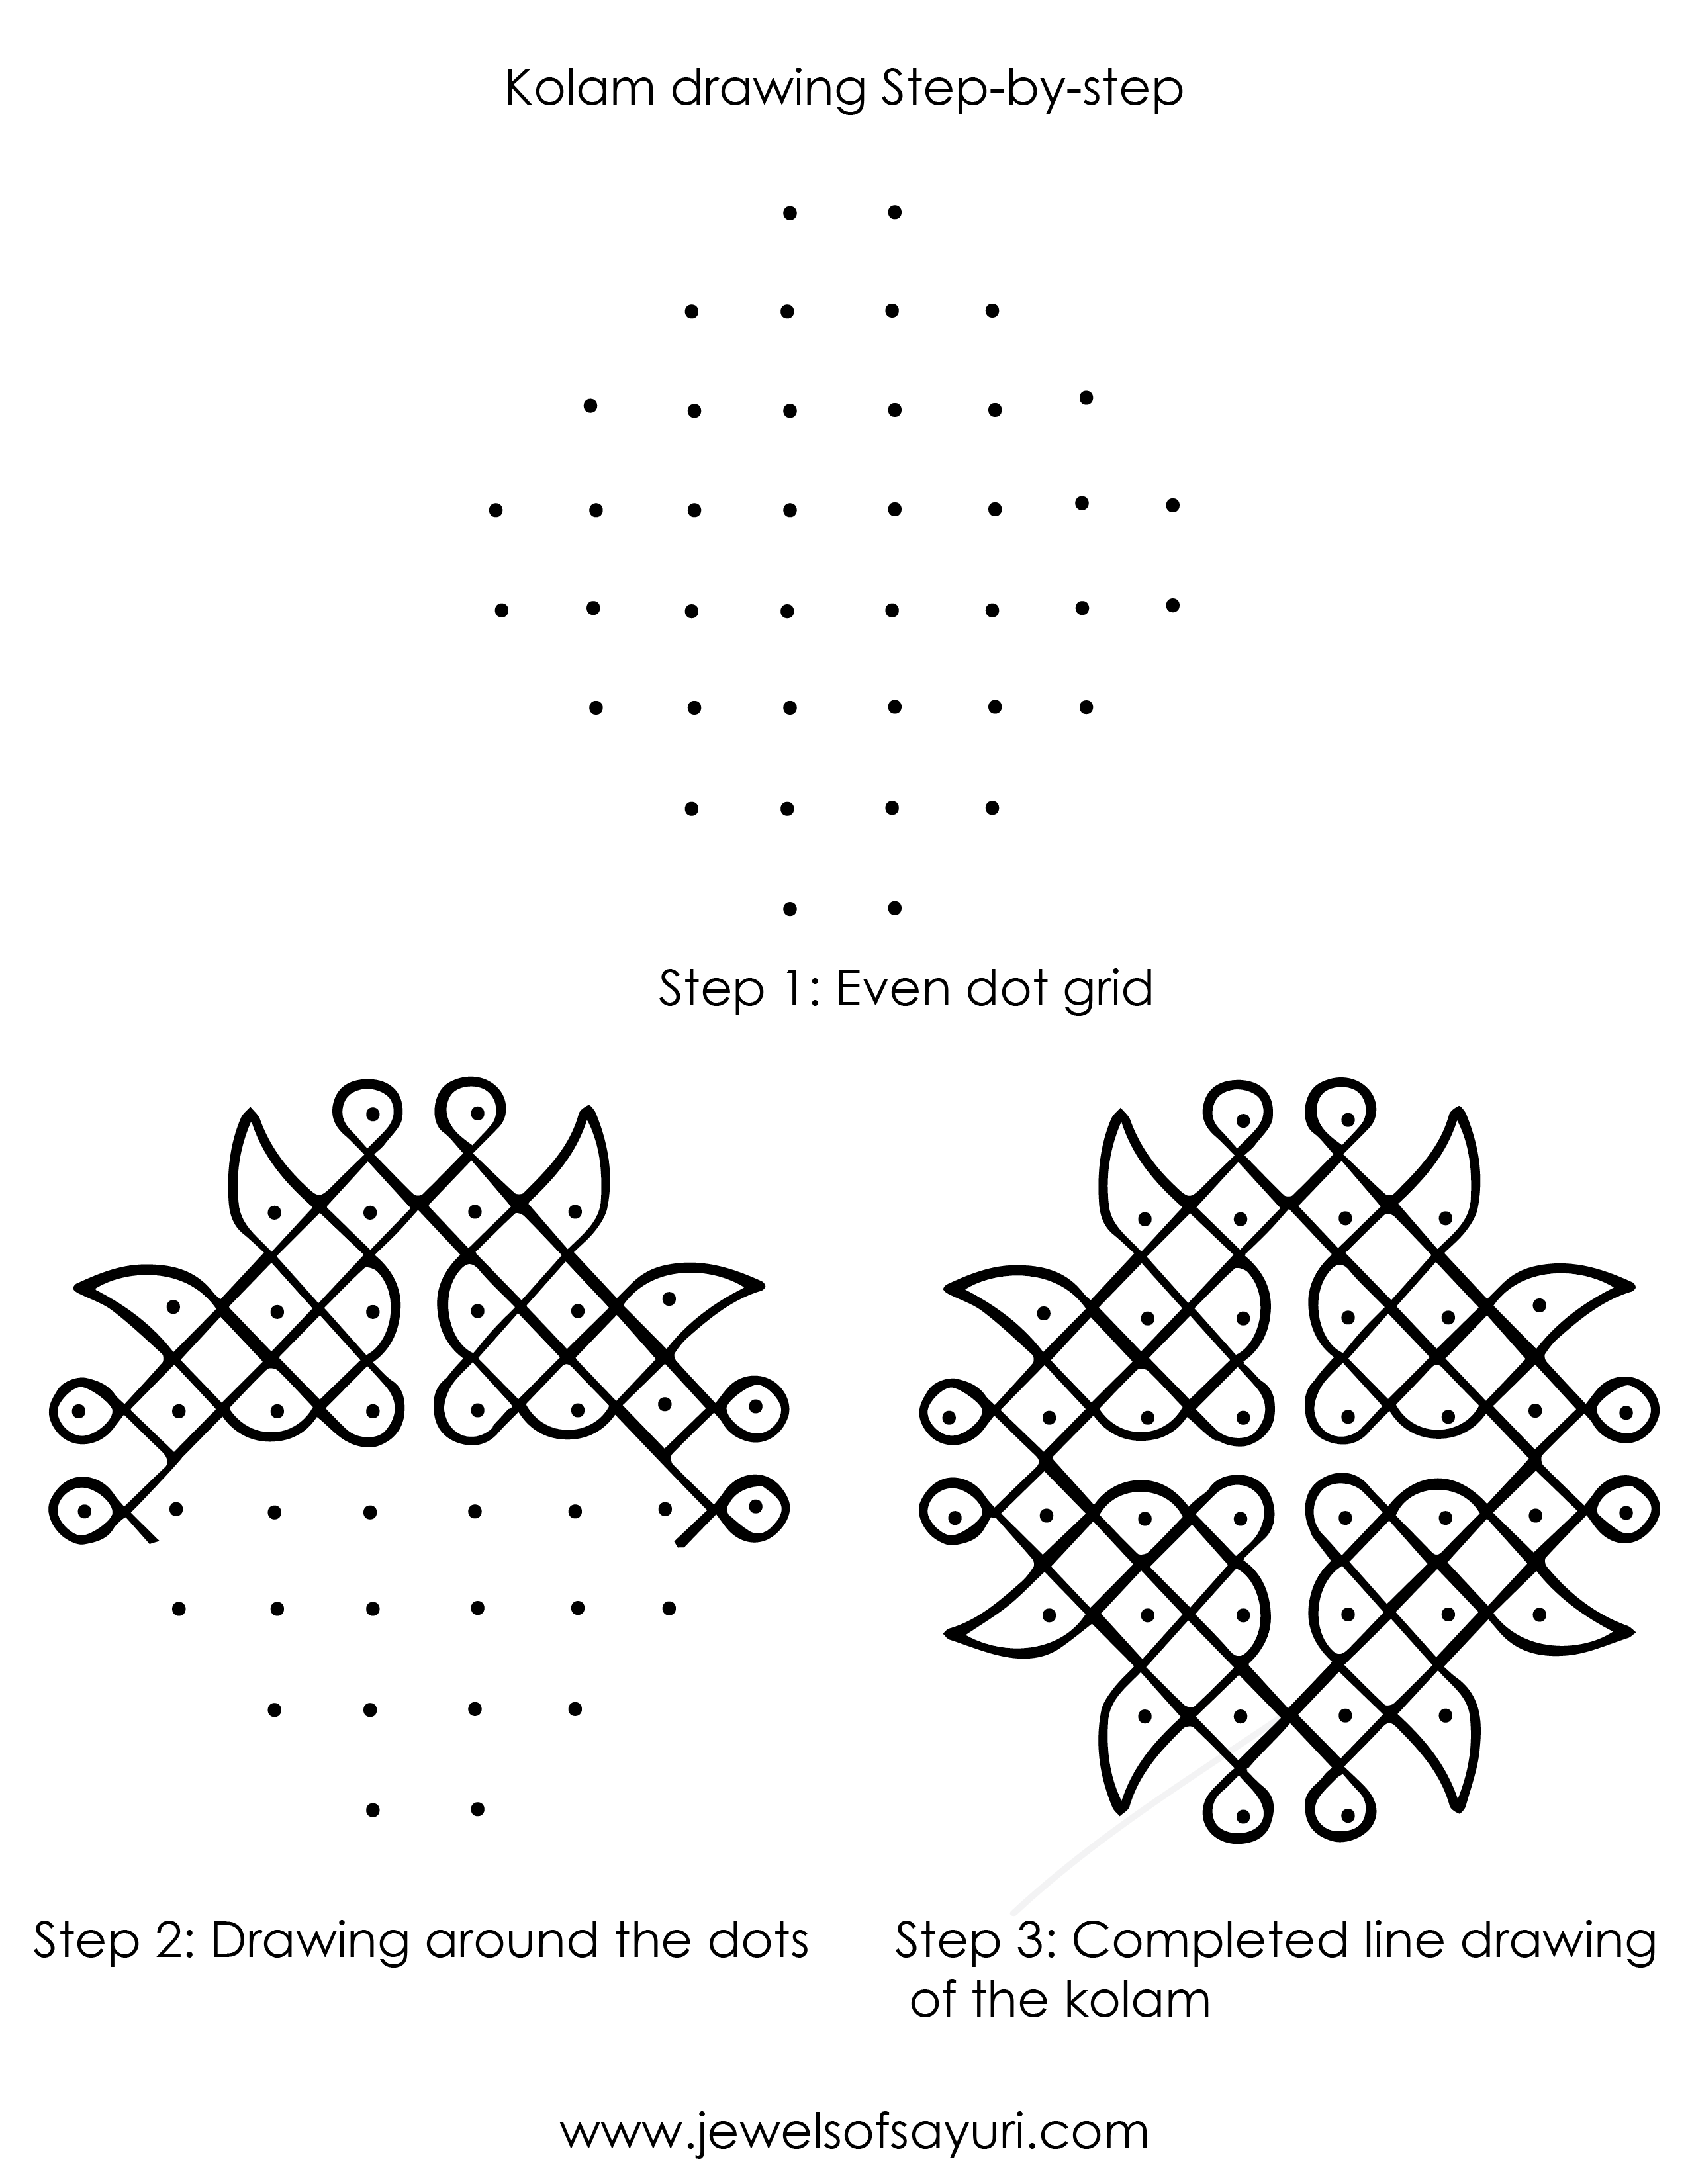
The process of drawing a kolam whether manually or digitally begins with creating a dot grid. You can either draw it manually, trace it on Illustrator and then clean up (easier) or draw on illustrator itself (faster).Once you have the vector drawing its easy to change the foreground/background colour or use any effects. I do colour manipulations on Photoshop at/after this stage depending on the complexity of the piece.
Making the Necklace
Making the Pendant – resin work
Then you resize, print and cut the artwork to fit the intended bezel. I then decoupage it and seal with 2-3 coats of glue. The piece needs to dry overnight or more depending on the weather. Any embellishments and trims that are inside the pendant go in at this stage. Once dried, I mix resin as per manufacturer’s instructions and pour in the bezel. You need to constantly check for bubbles for atleast and hour. Pendants dry, harden and cure for 72 hours. Now comes the most exciting part which is make the beaded chain or the necklace.
Making the necklace
I use a variety of beads of glass, metal and fabric in my necklaces. The colours are based on the artwork but not restricted to it. I either loop or string the beads depending on the bezel, its weight and how long I want the piece to be. Furthermore, it also depends on the beads that I am using, their sequence, weight, availability or lack thereof. Apart from the curing time, this is the longest process for me. So at times, I will bead when the pendant is curing.
While this post specifically focuses on how I make my kolam jewellery, this is the process that I use to make most of my resin jewellery pieces that have original art work on them. If you have any doubts or question, please ask and I will answer them.
I hope you found it interesting
Cheers

Leave a Reply