
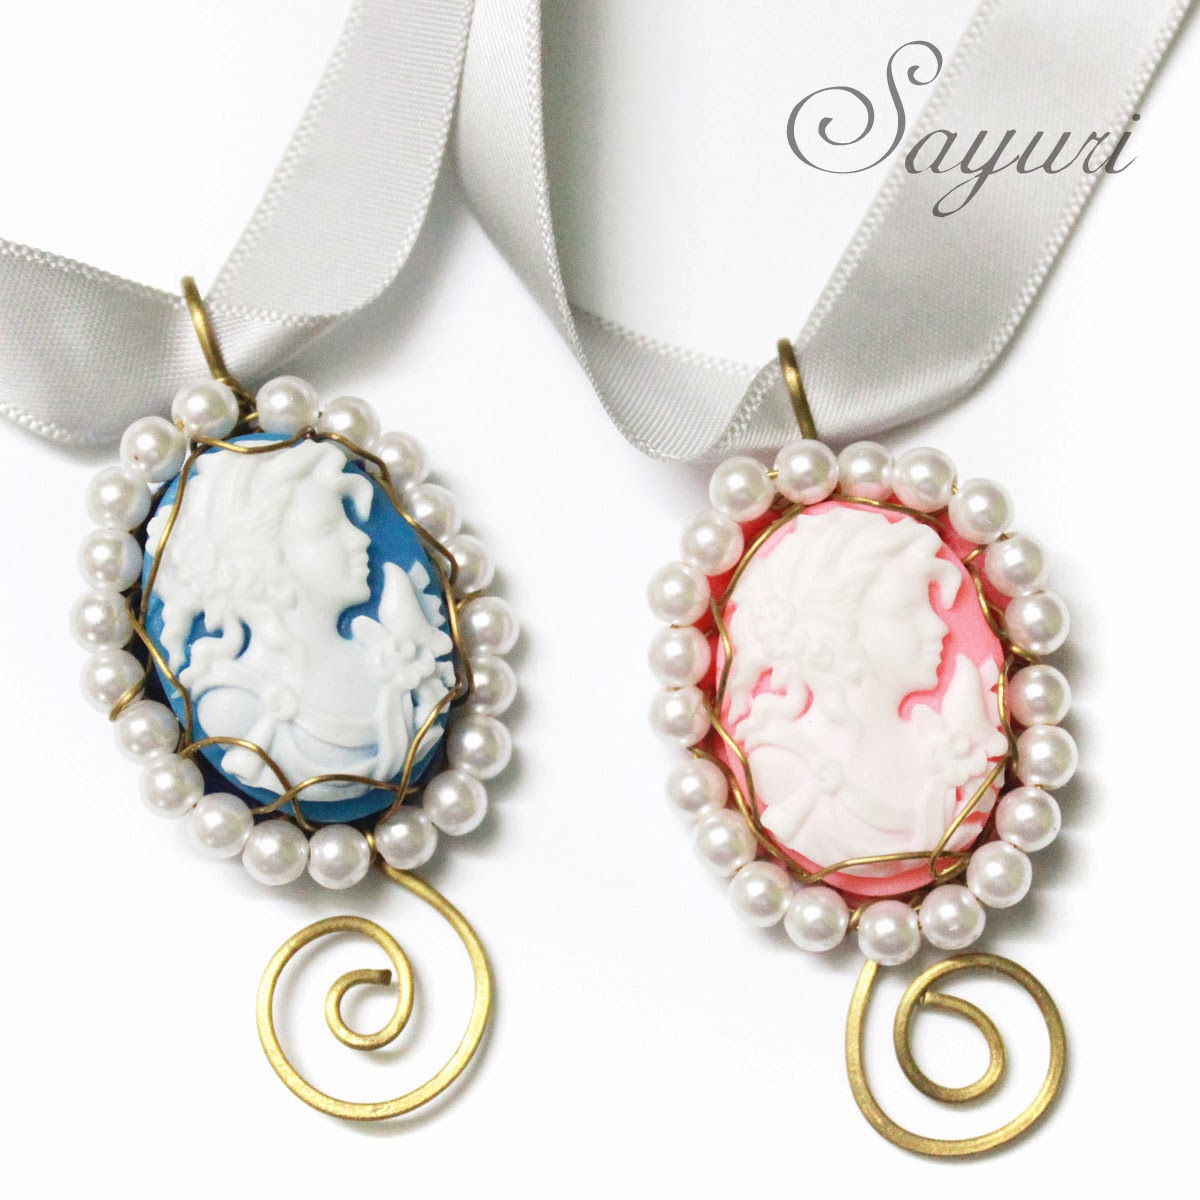
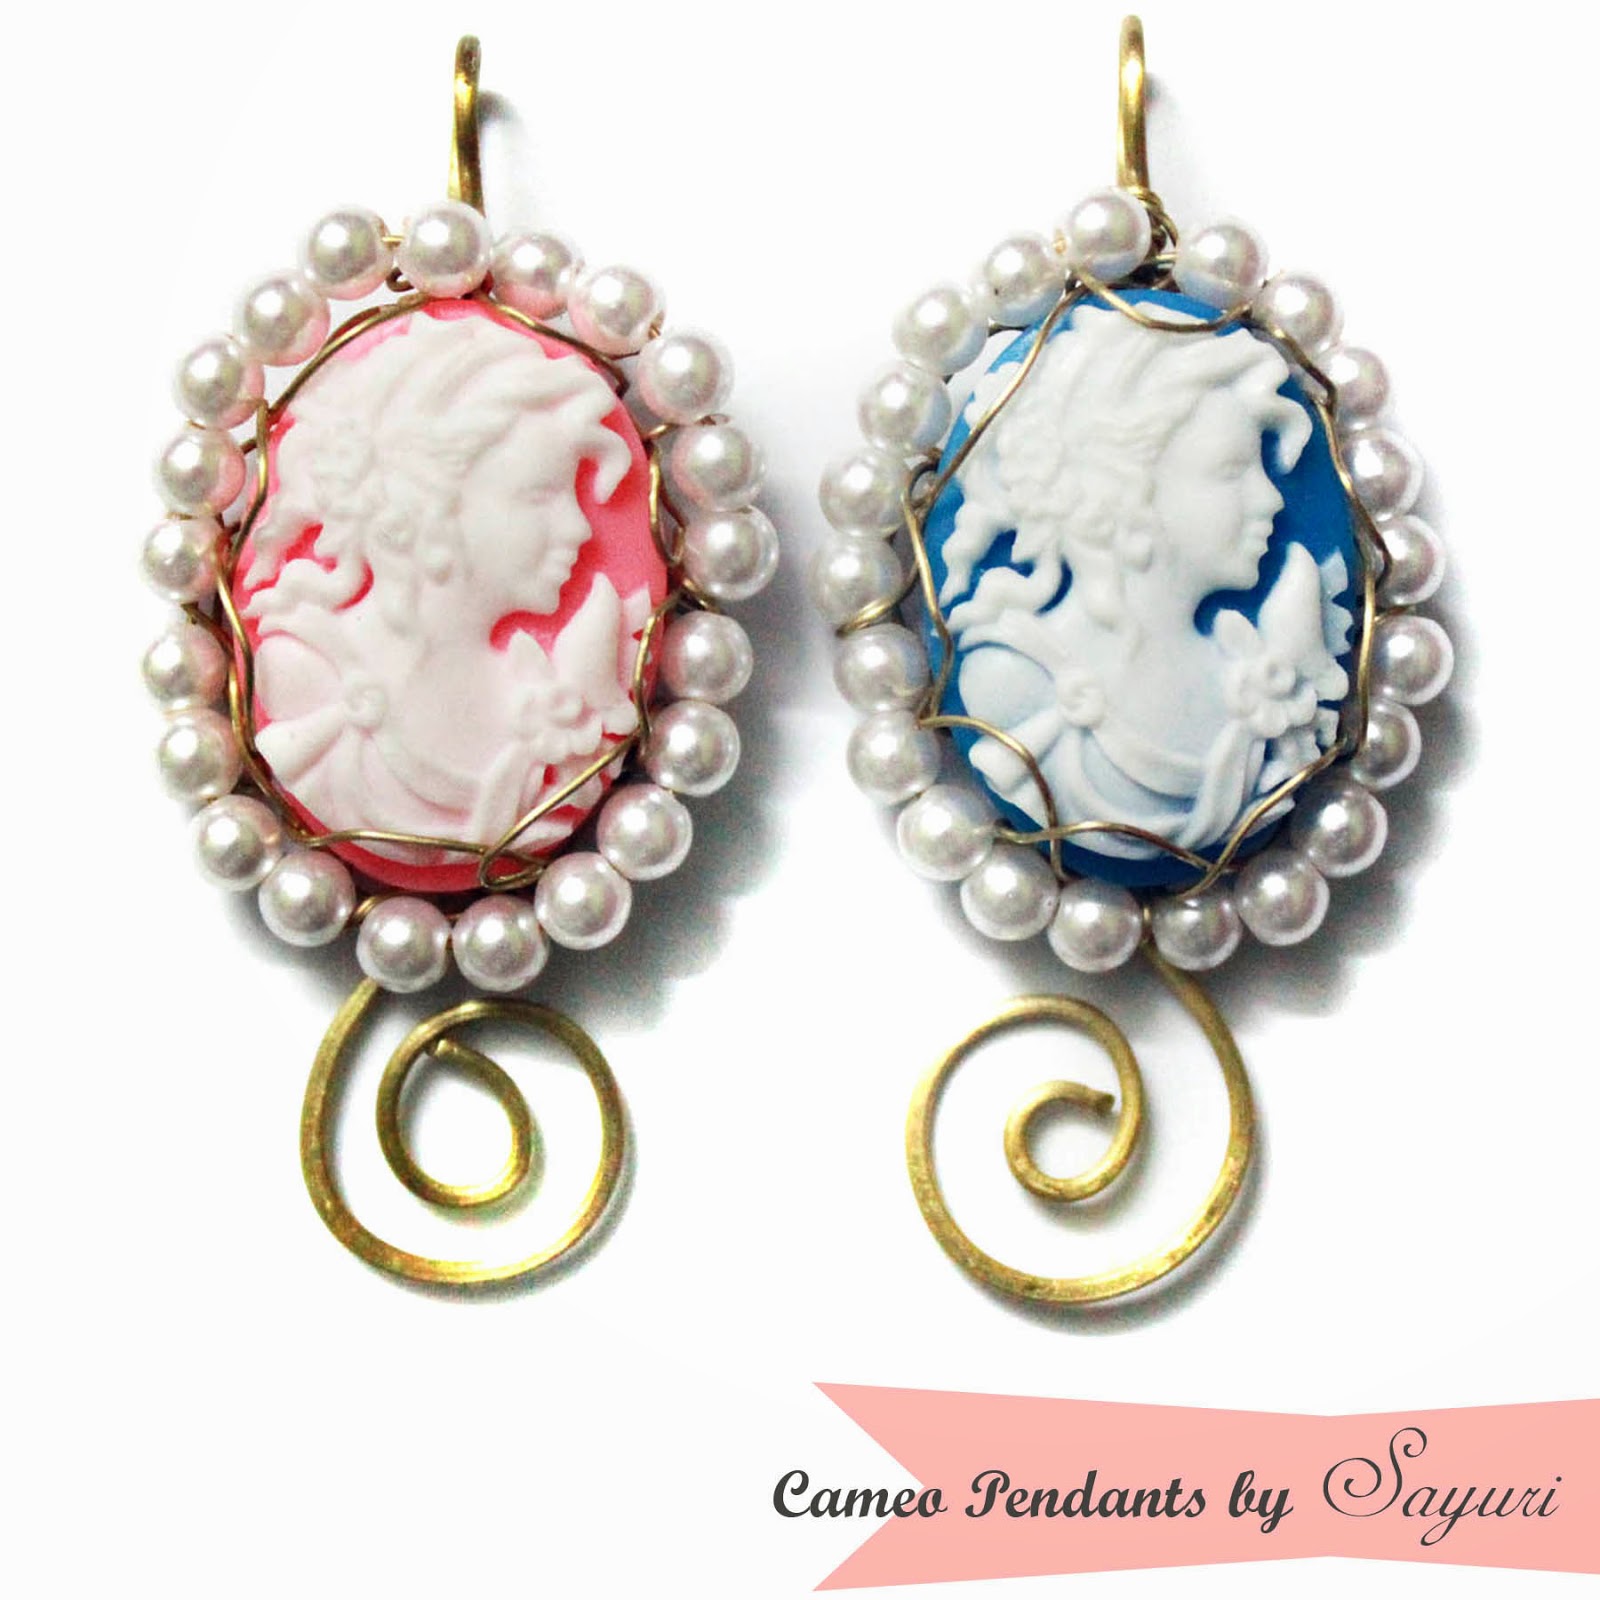
Remember these cool resin cameo pendants I made on custom order and blogged about last year here, finally I got around to making a tutorial for them. These cameos were only an inch big and my client wanted some statement pendants, so I added the pearl frame and wire swirl to make it bigger. I use this bezeling structure for almost all my cabochons as its easy, very forgiving and works with almost all types of wire. I call this “my looped bezel” and was inspired by Viking knit chains.
Wire wrapped Cameo pendant Tutorial
Materials (for one pendant)
Tools
– chain nose pliers
– wire cutter
– Step Looping Jewelry Pliers
– file
– hammer and steel plate (optional)
Level: Intermediate (wirework)
Time – 20 – 30 miuntes
Method:
1. Cut around 10″ of 16g brass wire, file the ends and using my eurotool step pliers created a bail at one end. I then alinged the wire around the circumference of the cabochon and wrapped the extra wire once around the bail leaving a long tail. This will create a frame that is slightly normaler than the cab – i.e. if you place the cab on the frame, it should stay.
2.If you want to flatten the tail, give it a few whacks with a hammer on the steel plate now.
.jpg&container=blogger&gadget=a&rewriteMime=image%2F*)
3. Take around a metre of 26g wire (I usually eyeball this and add or subtract as I see fit) and start wrapping at the bail to secure the joint
4.Create the side walls – this is called a wire net. imagine the frame to be a straight line and take the 26g wire around it to form a loop, turn it to one side and press, using this same In-out- press technique do a round of loops around the frame. do not cut the wire.
5. Continue making the second layer, using the inverted loops of the first layer as anchor points. take care that all loops and inverted loops are of the same size and shape (they must be round). When complete (wire comes back to the bail) it should look like a flower, again do not cut the wire.
6. Set the cameo on the frame and slowly push up the side net, until it envelopes the cameo, press it to well the cameo in the front. It should be well set now.

7.If you have done the netting close together, you can leave it as is or you can choose to trim it with beads like I did. String seed pearls into the extra wire and go around the bezel and wrap at bail. Anchor it at the side and back by wrapping the pearl circle to the mail bezel. If ther is any extra wire you can cut it now.
8. Curl the tail of the frame into swirls to complete the pendant.
9. Finishing the back – You can do netting at the back or cover with a felt circle if you dont like the cab showing.
String the pendants with beads or chain or simply a ribbon to wear it
Tips and guidelines
#Tip 1: Getting the frame right requires some practise and I recommend that you use dead soft initially and then graduate to soft or half hard.
#Tip 2: The frame doesnt have to be a perfect oval, I used a rounded pentagon here and it worked well for me.
#Tip3: Gauge of wrapping wire depends on the design/person and kind of coverage you want. Just make sure that it doesnt kink by straightening it continuously.
Since this is an intermediate tutorial (requires basic wire work skills), I have explained only the complicated steps, but if you have a doubt, please ask me and I would be happy to clarify.
I hope you find it interesting
Cheers 
Leave a Reply