
Many people know my brand as Jewels of Sayuri, rather than as Sayuri which is the actual name. Disturbing as it might be, it proves the power of blogging and social media. Social media platforms have come and gone (Google+ is going away soon) and so did websites but the tag of Jewels of sayuri remains as we celebrate the Ninth Blog anniversary.
Ninth Blog anniversary
When I started my jewellery blog in February 2010, my (then) best friend said that it might be better if I wrote on “other things as well” apart from jewellery. That way more people would be interested in my blog and I would actually have topics to write about. Nine years have passed and our friendship is long gone, but I have so much more to write about in terms of jewellery. I am glad that I didn’t listen to him then. For if I had, I wouldn’t have met all the glorious beaders and jewellery enthusiasts who have become my friends through this blog.

While I do not believe in a marker like “anniversary,” it is important to take time and give thanks. I wholeheartedly thank not just the readers of this blog and SM followers for also everyone who had helped me design, articulate my thoughts and write for the last nine years This blog is maintained by the minuscule amount of money received from native advertising and sponsored posts. So I extend my thanks to advertisers and to those who buy products through my affiliate links.
In my last year’s anniversary post on How to find readers for your blog, I shared some useful tips of blogging. This year, in the spirit of sharing meaningful content, I will be sharing a tutorial in this post. A DIY tutorial to create Frosty feather earrings. The inspiration prompt for this tutorial comes from Ms. Erin and her We’re all ears February 2019 Challenge theme which is Frozen.

Frozen
When I saw this theme I asked myself this “What does frozen mean to me? I thought of snow, ice, hail, icicles, colours like white and silver, and finishes like Aurora Borealis. At a deeper more psychological level, anything frozen is a metaphor for something that is cold, tough, brittle or something that has stopped in its path and that which is a block. Could it be a signifier of my life at the moment, I wondered. Shuddering at that dark thought, I did what I always do to calm me – Think of a happy place.

One of my “happy places” is my memory of going on a flight trip in Nepal in the Himalayan mountain ranges in 2011. It was the first time I ever saw snow, glittering, and delicious like powdered sugar or whipped cream on chocolate cake. While the actual Everest sighting was a bit underwhelming, seeing snow capped mountains was delightful and truly wonderful. It is a sight that I recollect in rare moments that I try to meditate.
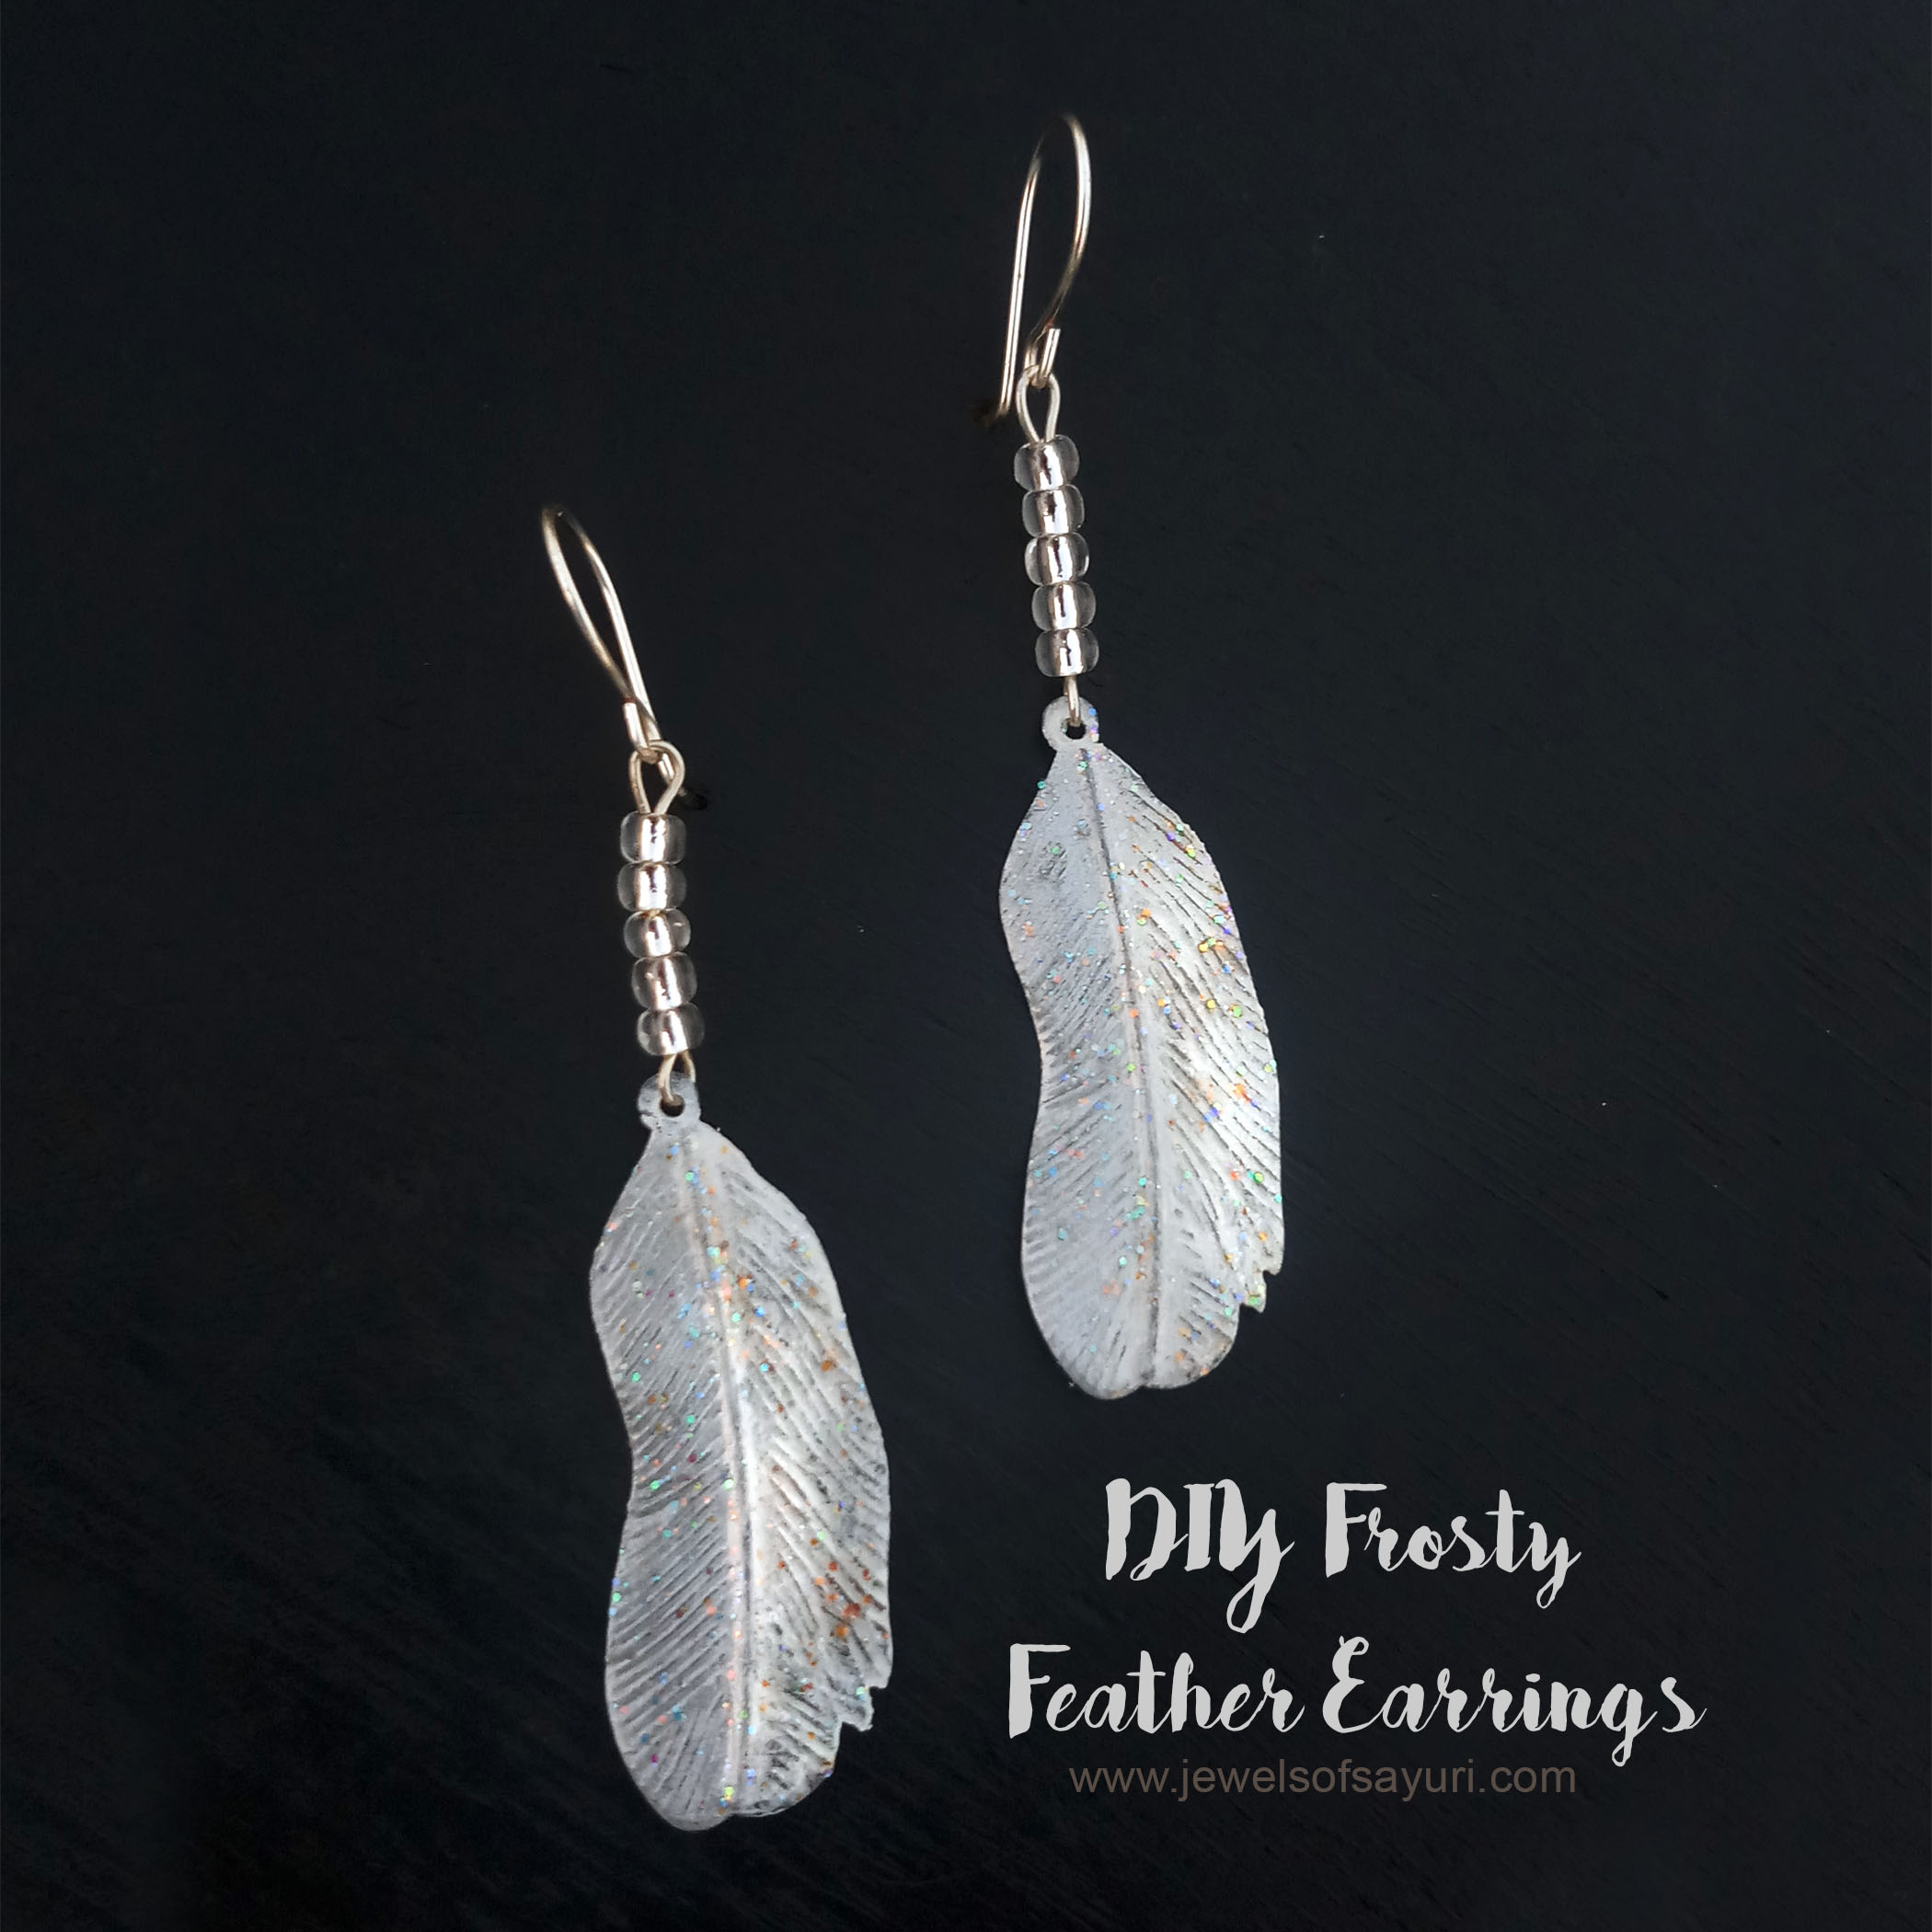
DIY Frosty feather earrings
The mountains had frozen to stand tall amongst men to remind them of what it is to be righteous and bold while constantly evolving. This would be a even better signifier for me, I thought. So I went back to my photographs from the trip for inspiration. I knew I had to make earrings that were as light a snow, textural, stoic and glimmering in light. I made “Frosty feather earrings” and “A Drop of snow” based on those ideas. Find here a tutorial to make your very own Frosty feather earrings.
Materials
- Iron/pewter feather charms
- Clear seed beads 6/0 – 10
- Silver finish artistic wire
- Marble (white) vintage patina ink
- Nouveau Silver patina ink
- Modpodge sparkle
- Tools – Stepped pliers, wire cutter, paint brush, bench place, nylon hammer, file or cup burr
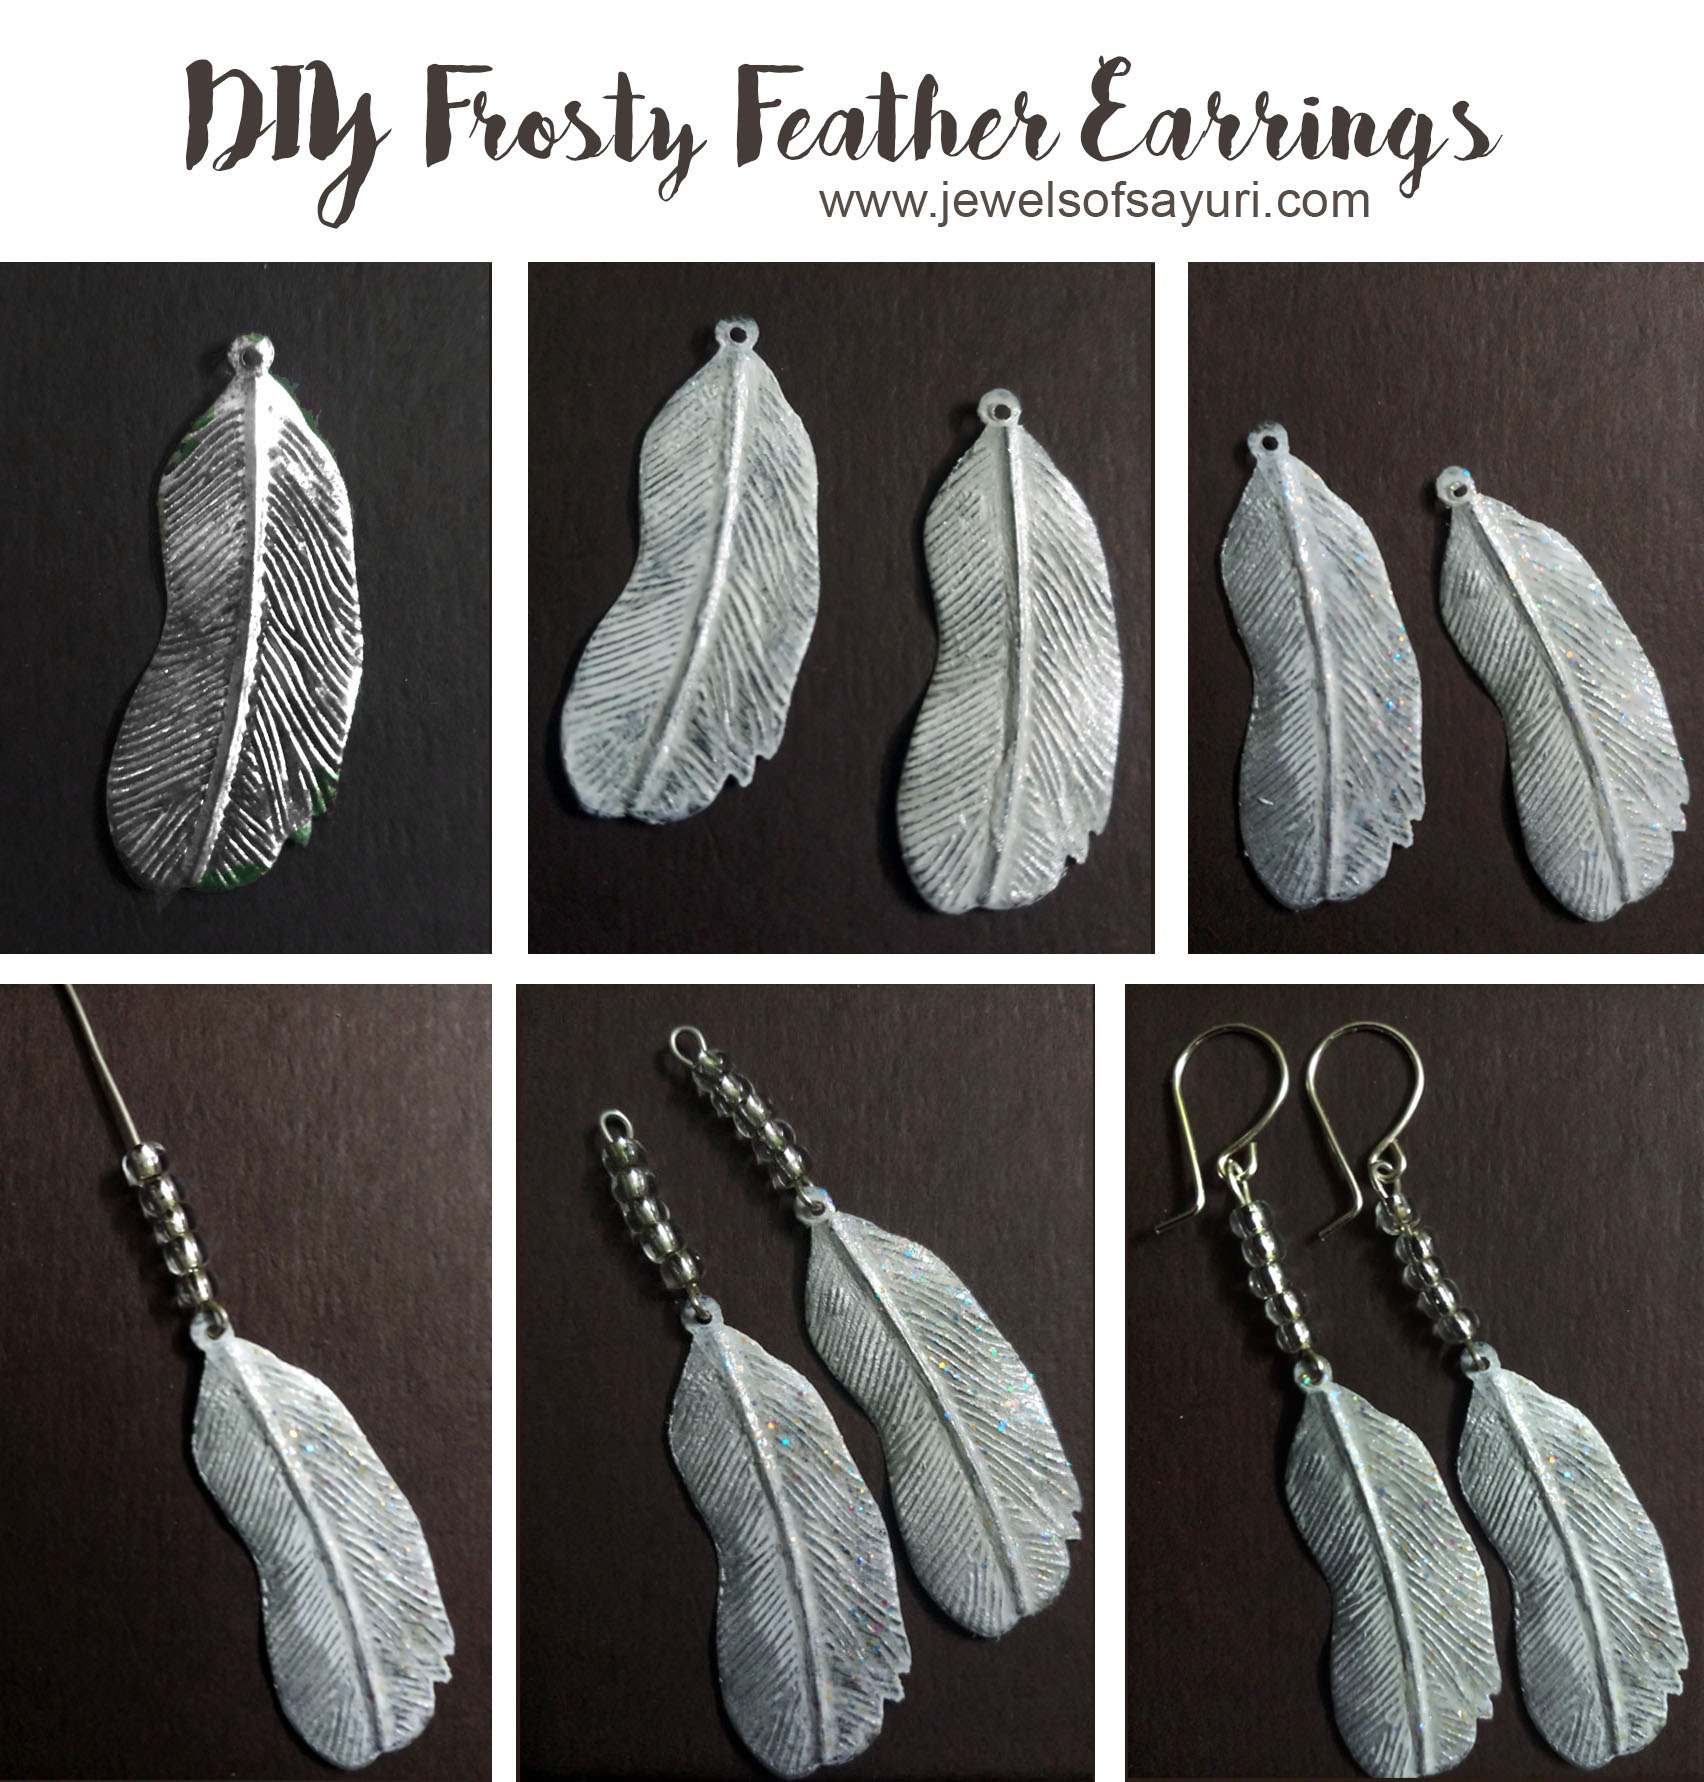
Method
- Clean your feather components and colour them using white patina ink. Apply 2 coats for an opaque look. I coloured both the front and back of my components. Optionally, you can also use one layer of white gesso and one layer of ink for a completely covered look.
- Once it dries, apply silver ink on one half of the feather and let dry. Apply 1-2 coats of modpodge glitter on the front and back, waiting for it to dry in between.
- Using your wire cutters, cut 2″ of wire and make a loop and connect it to the feather component.
- Add 5 seed beads to the eyepin and loop. Repeat the same for the second feather. Now you can add earhooks to complete your earrings

How to make wire Earhooks
- Flush Cut two 2″ pieces of wire and straighten them
- Holding both pieces of wire together in your non dominant hand, use your stepped pliers ( holding them in your dominant hand) to make a small loop at one end of the wires.
- Wrap the extra wire around the largest step and bend the last 3-4mm at an angle.
- Make sure that both the earwires are of the same shape. Gently hammer them using a bench block and nylon hammer.
- File the end or use a cup burr to round the wire that goes into your ear piercing.
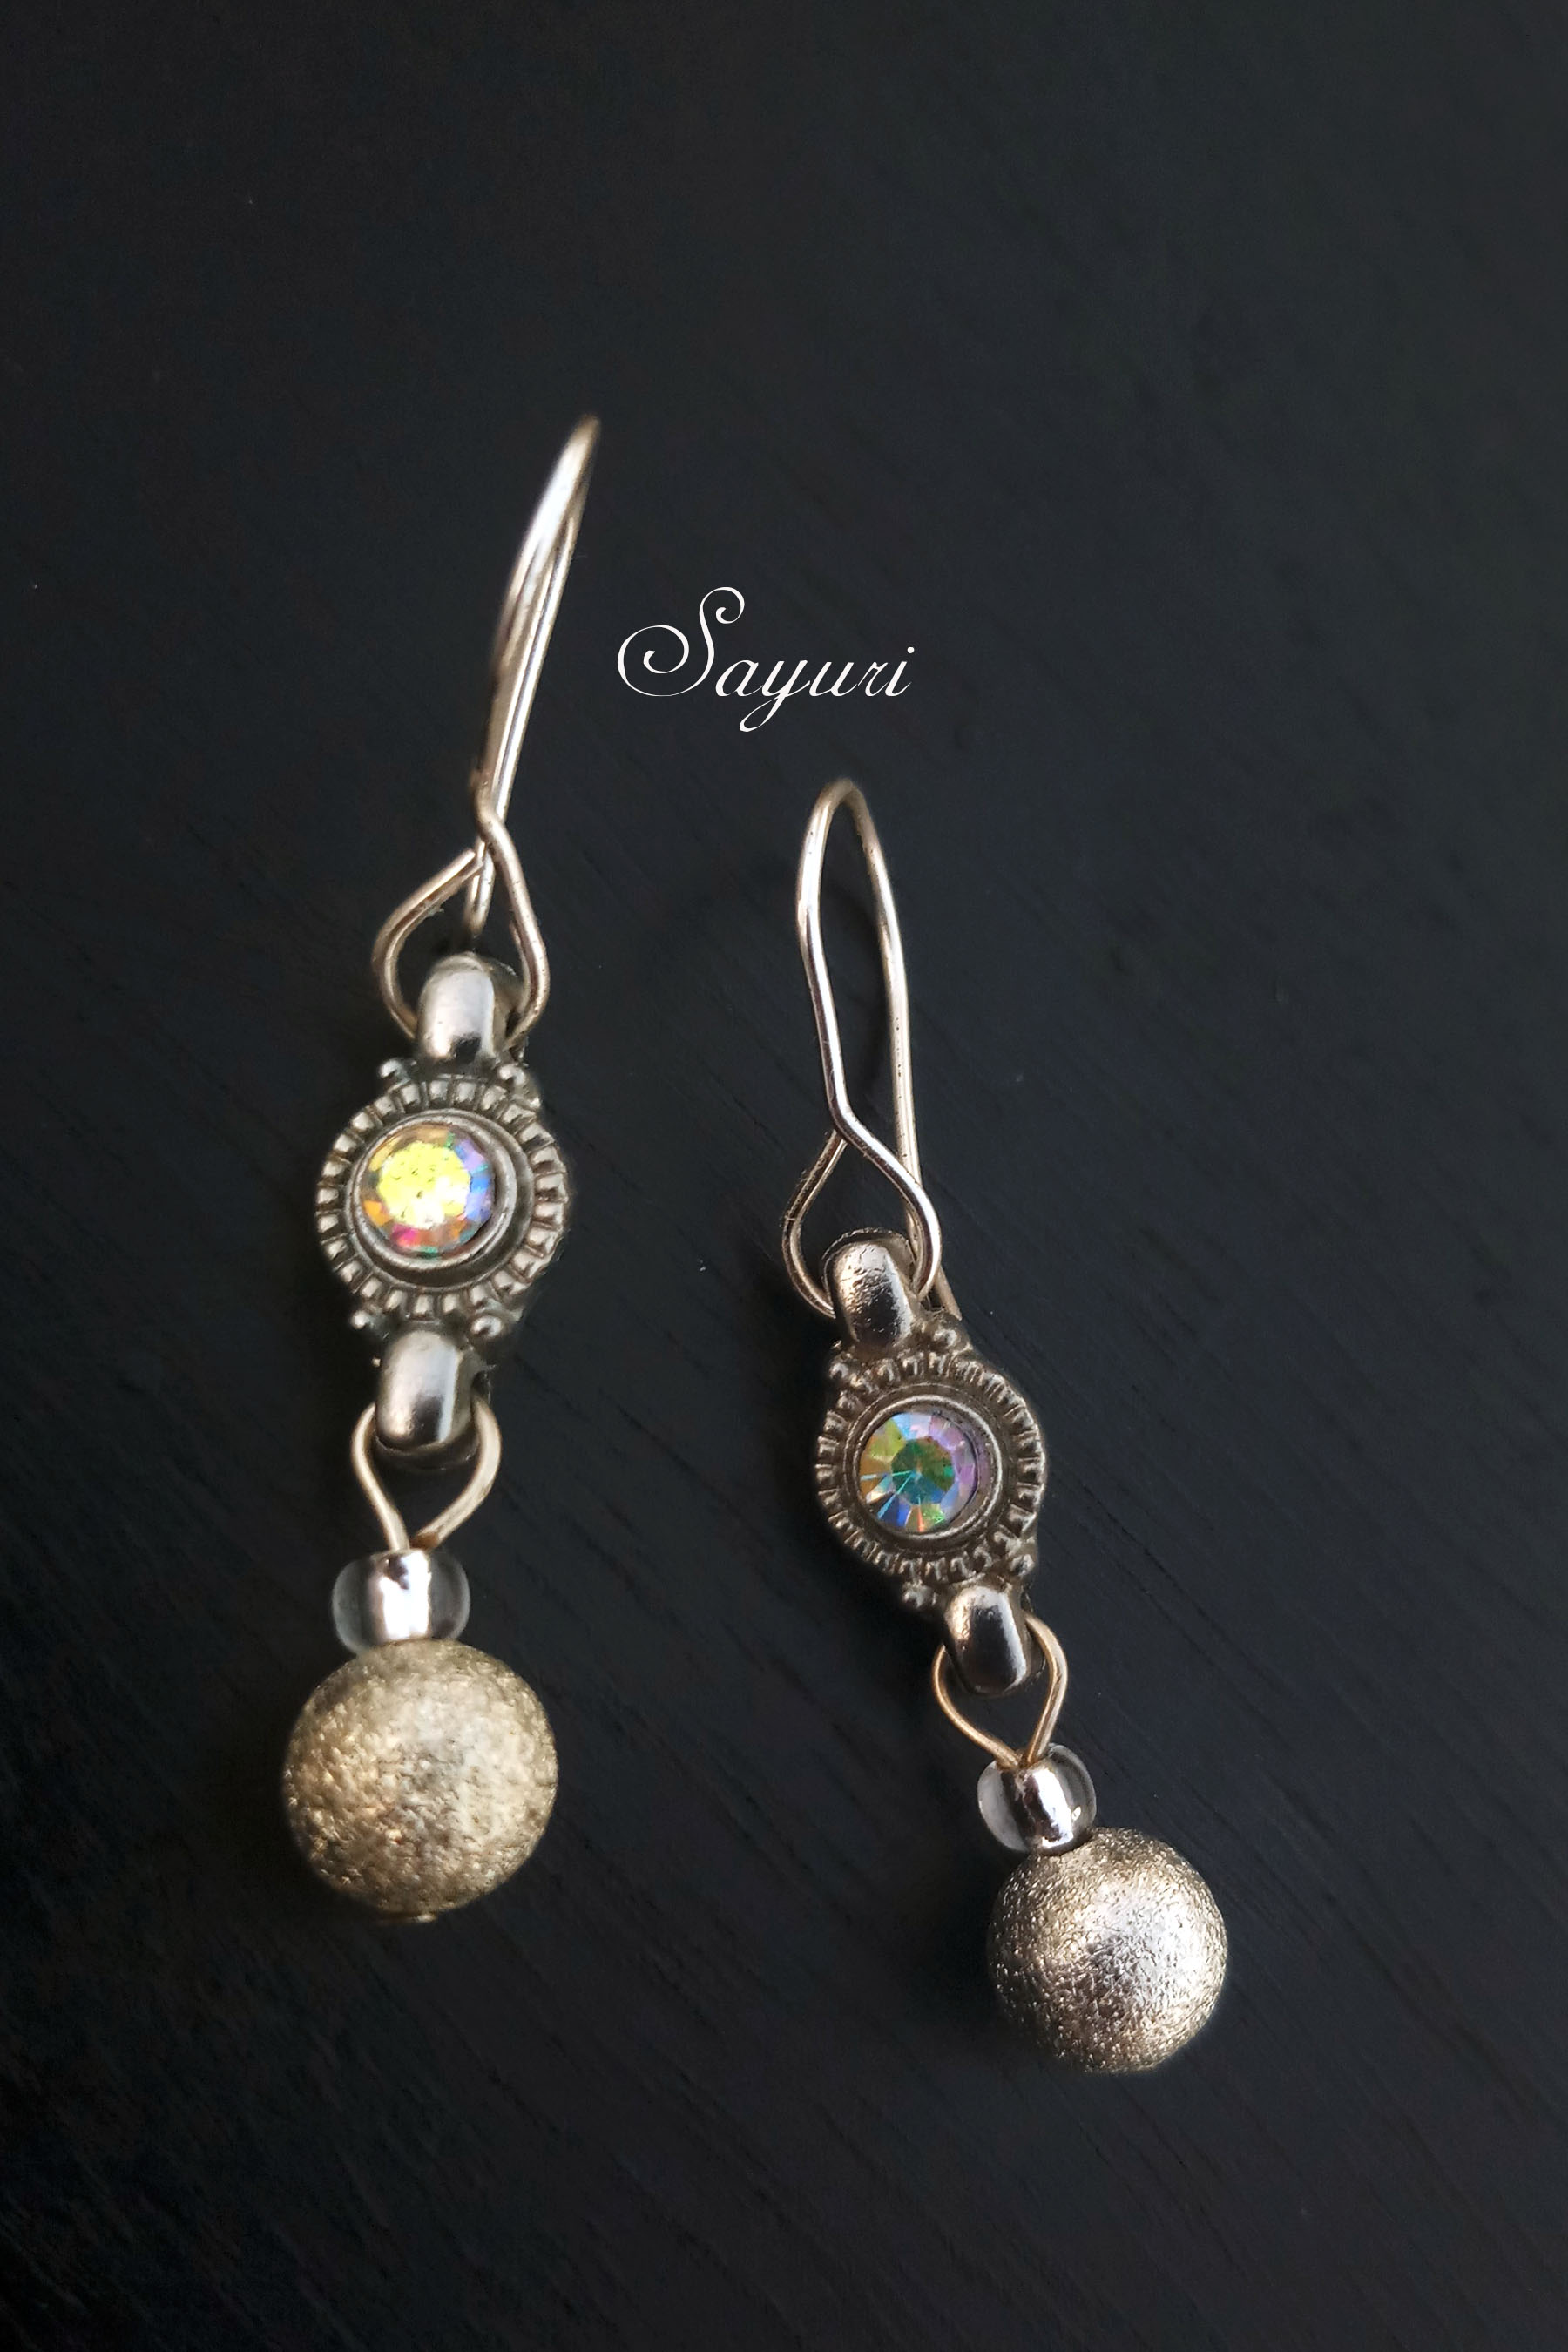
Ice Earrings
The Frosty feather earrings are lightweight and are sparkly. But it was a little difficult to photograph them. Worrying that they might not be enough for a reveal, I made the pair that I would like to call “Ice.” It is a quick do. Two crystal connectors, 4 beads, two head pins, some wire and tools are all that are required to make this lightweight pair. Unlike the first design, here I wanted to play a bit more with textures in terms of finishes. I wanted to show the clarity of ice, its coldness, the colours in reflection, the grainy texture that crushed ice imparts and finally the shine in my earrings.
Both the Frosty feather earrings and Ice earrings are not for sale. But feel free to use the tutorial to make them for yourself, to gift or to sell.
Every year, I come up with goals for my blog in my blog anniversary post and I do attempt to actualise most of my plans. However, my current schedule is very hectic which makes it difficult to find time to make jewellery let alone write about it. So This year my only plan is to keep blogging without giving up. I hope that I am able to find tiny pockets of time everyday to type out my musings as blog posts.
Looking forward to your support as always. Please do comment, share posts and spread the word. It really means a lot to me. Thank you.

PS : Please do hop to the Earrings Everyday blog to see how other makers have interpreted Frozen.

Leave a Reply