
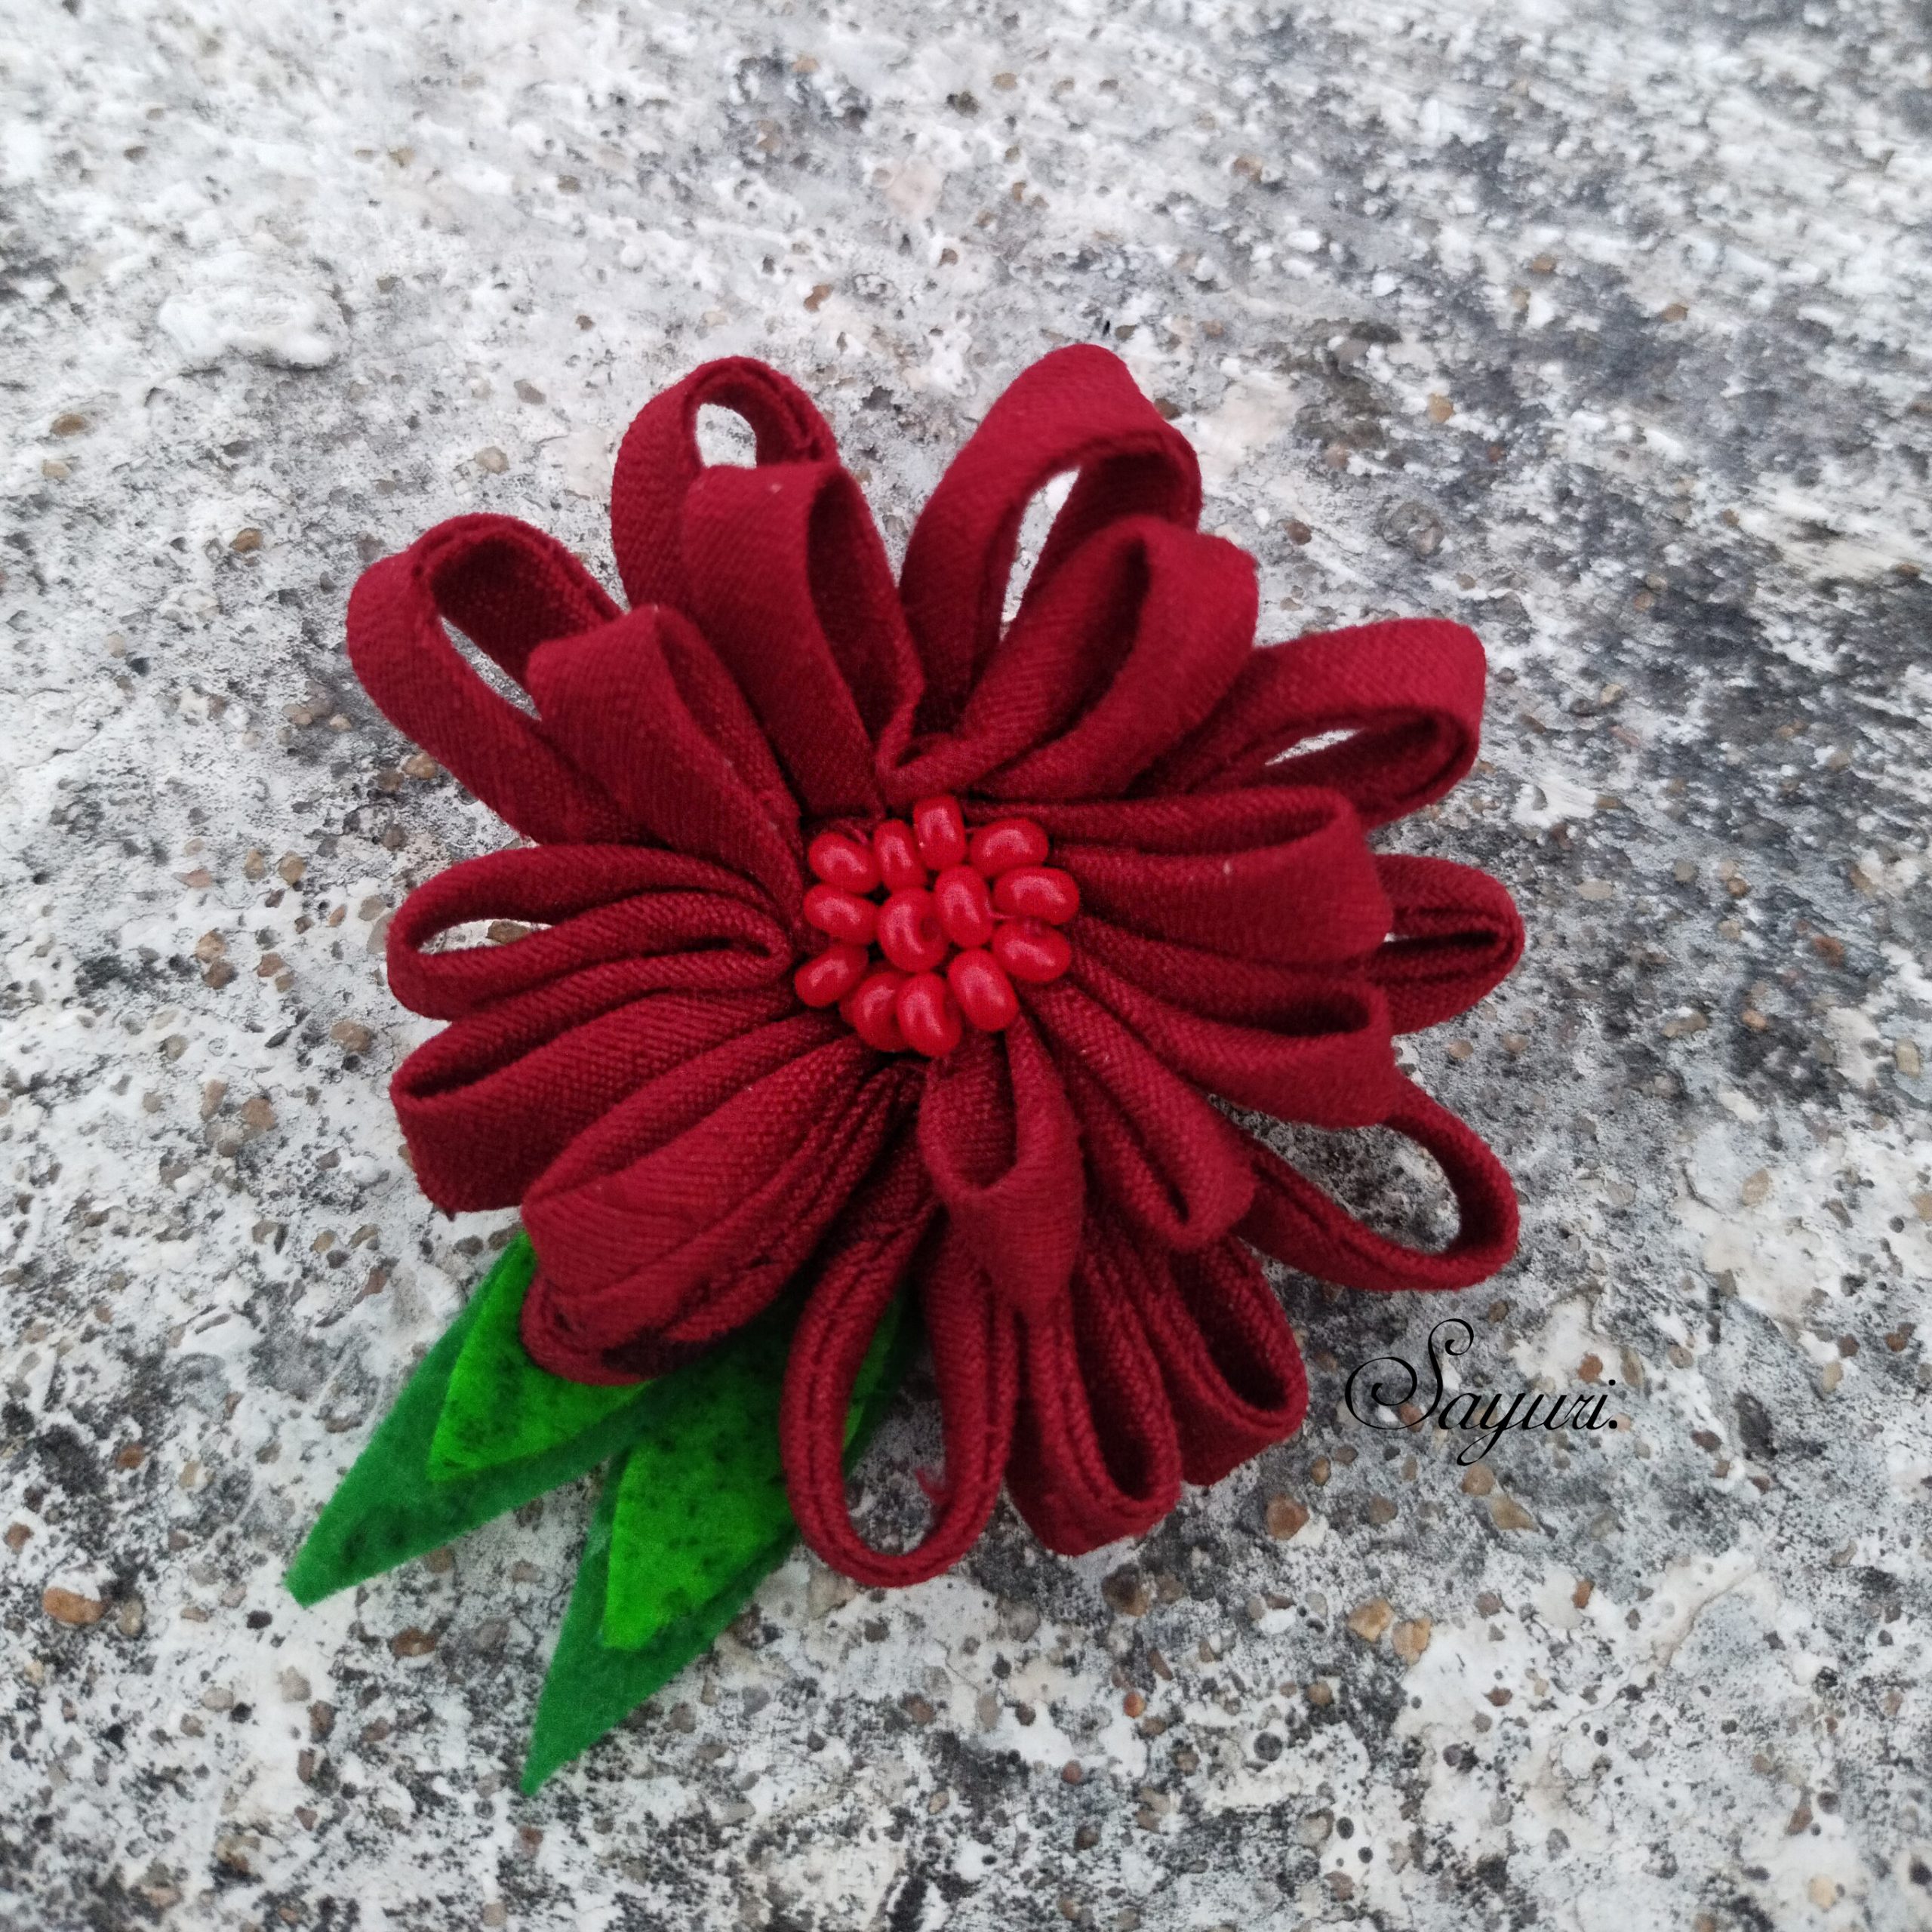
Chrysanthemums are one of my favourite flowers to make using paper or leather, mainly because they are so easy to make. I have been wanting to try making one with fabric for long but couldn’t figure out how to finish the edges of petals. Late last year I bought a whole bunch of sewn flat fabric cords on sale and realised that I could make a chrysanthemum easily using a flat fabric cord but pleating it. Since it turned out to be pretty and a surprisingly quick make, I turned it into a floral hairclip. If you would like to make one too, here is the DIY Red Chrysanthemum hairclip tutorial.

DIY Red Chrysanthemum hairclip tutorial
Materials
The cord that I used is a poly-cotton cord; silk might not need ironing. You could also sew a 0.5cm cord out of your favourite fabric and use it to make flowers.
- Sewn flat fabric cord – Maroon – 30 inches
- Red seed beads 6/0
- Red felt circle
- Green felt – light and dark to cut out leaves
- Hair clip or barrette
- Rubber adhesive (Fevibond)
- Needle and matching thread
- Scissors
Method – Make the Red Chrysanthemum flower
- Straighten your fabric cord by slightly ironing or pressing it with your hands.
- Thread a needle and make a knot. Start sewing at one end of the cord.
- Pleat the cord up and down so that you get petals as shown in the image. My first few pleats were approx 0.75 inches long, then I increased it to 1 inches and eventually 1.25 inches to get layers.
- Sew through them and pull the thread when you come to the end. As the pleast gather, spread and arrange them as you like.
- Turn the flower to its back. Sew the first pleat to the last and knot. Tack the opposing side as well.
- Bring the thread to the front and string enough beads on the thread to cerate the center. Coil the thread and sew it to a pleat. Tack the beaded thread at a few places to keep the beads in place. You can run your needle via a couple of beads on all four sides if you want to make the attachment really strong.
- Sew up and down to tack all the pleats together without the stiches being visible from the front. Cut your thread.

Method – Make the Red Chrysanthemum hairclip
1.If you want to add leaves to the back of the flower, cut leaf shapes out of green felt and glue them together using the adhesive. Glue them to the back of the flower. I dotted the leaves with a felt pen for texture, it looks better in person than in photographs though.
2. Cut a felt circle and makes two slits on it to fit the chosen hairclip. Open the clip and slide it through. Glue the clip along with the felt circle to the back of the flower. Press and leave to dry.

I hope that you enjoy reading this DIY Red Chrysanthemum hairclip tutorial. Do give it a try, its quick and easy. I have been making lots of hair accessories since my hair is growing longer (after my haircut last year). However, it is neither long enough nor thick enough to hold real flowers. Therefore, light weight hairclips and wraps are my best bet. But you could turn the same flower into a brooch easily by replacing the clip with a pin back.
I hope you found it interesting
Cheers

What do you think?